User Manual
Try it at https://test.codepod.io
Note that this is a test server, and no data is preserved to our official release.
Table of Contents:
Introduction
CodePod is a web app. You can login with your Google account and start using it right away. All code are saved in the cloud and executed in the cloud runtimes.
This manual describes all the Operations and User Interface for the app.
tl;dr (Cheatsheet)
| How to .. | Solution |
|---|---|
| Create a pod | Right click -> New -> Python |
| Delete a pod | Pod Toolbar -> More -> Delete |
| Write markdown | Right click -> New -> Note |
| Select multiple pods | Drag on the Canvas |
| Move a pod | Use the drag handle on the toolbar |
| Move multiple pods | Select multiple pods, then drag to move |
| Create a Scope | Select multiple pods, right click on the selection, choose "create scope" |
| Delete a scope | Scope toolbar -> More -> Delete |
| Resize a pod | Drag at the border on the right |
| Resize a scope | Drag at all borders or corners |
| Move around the Canvas | Touchpad: Use two fingers to move around |
| Mouse: hold Middle button then drag | |
| Zoom in and out | Touch pad: two fingers pinch |
| Mouse: scroll with middle button | |
| UI: the + and - control on the bottom-left toolbar | |
| Run code | Start the python kernel on the top-right menu, then use run button on the toolbar |
| Create an edge | Drag from the edge icon on the toolbar onto the target node |
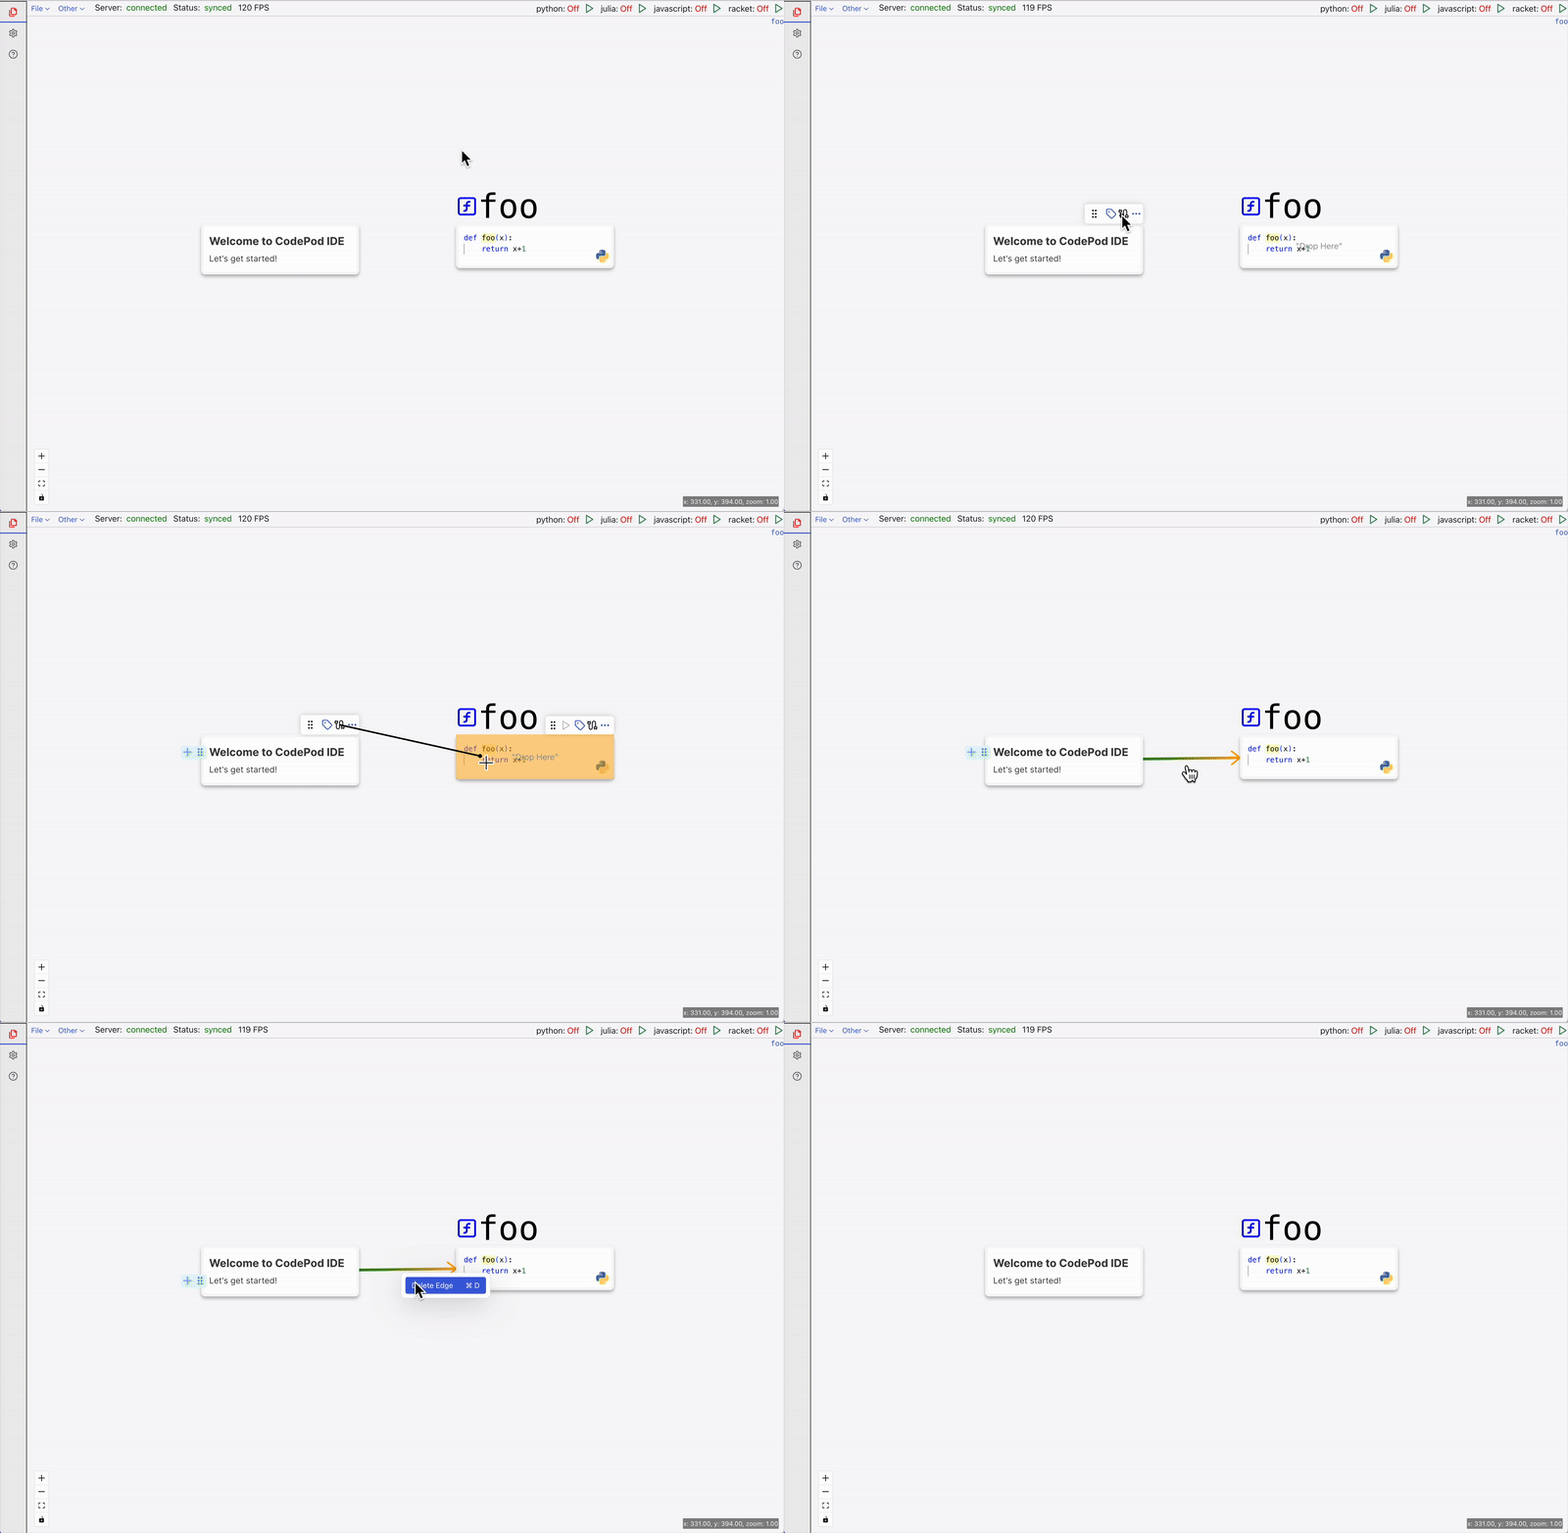
| Delete an edge | Right click on the edge and choose "Delete" |
FAQs
- How to create a pod?
- How to delete a pod?
- How to create a scope?
- How to move into and out of a scope?
- How to execute some code?
- How to write markdown?
- How to create edges?
- How to move on canvas?
- How to resize?
- How to copy & paste?
- How to import jupyter notebook files?
Pods
Creating pods
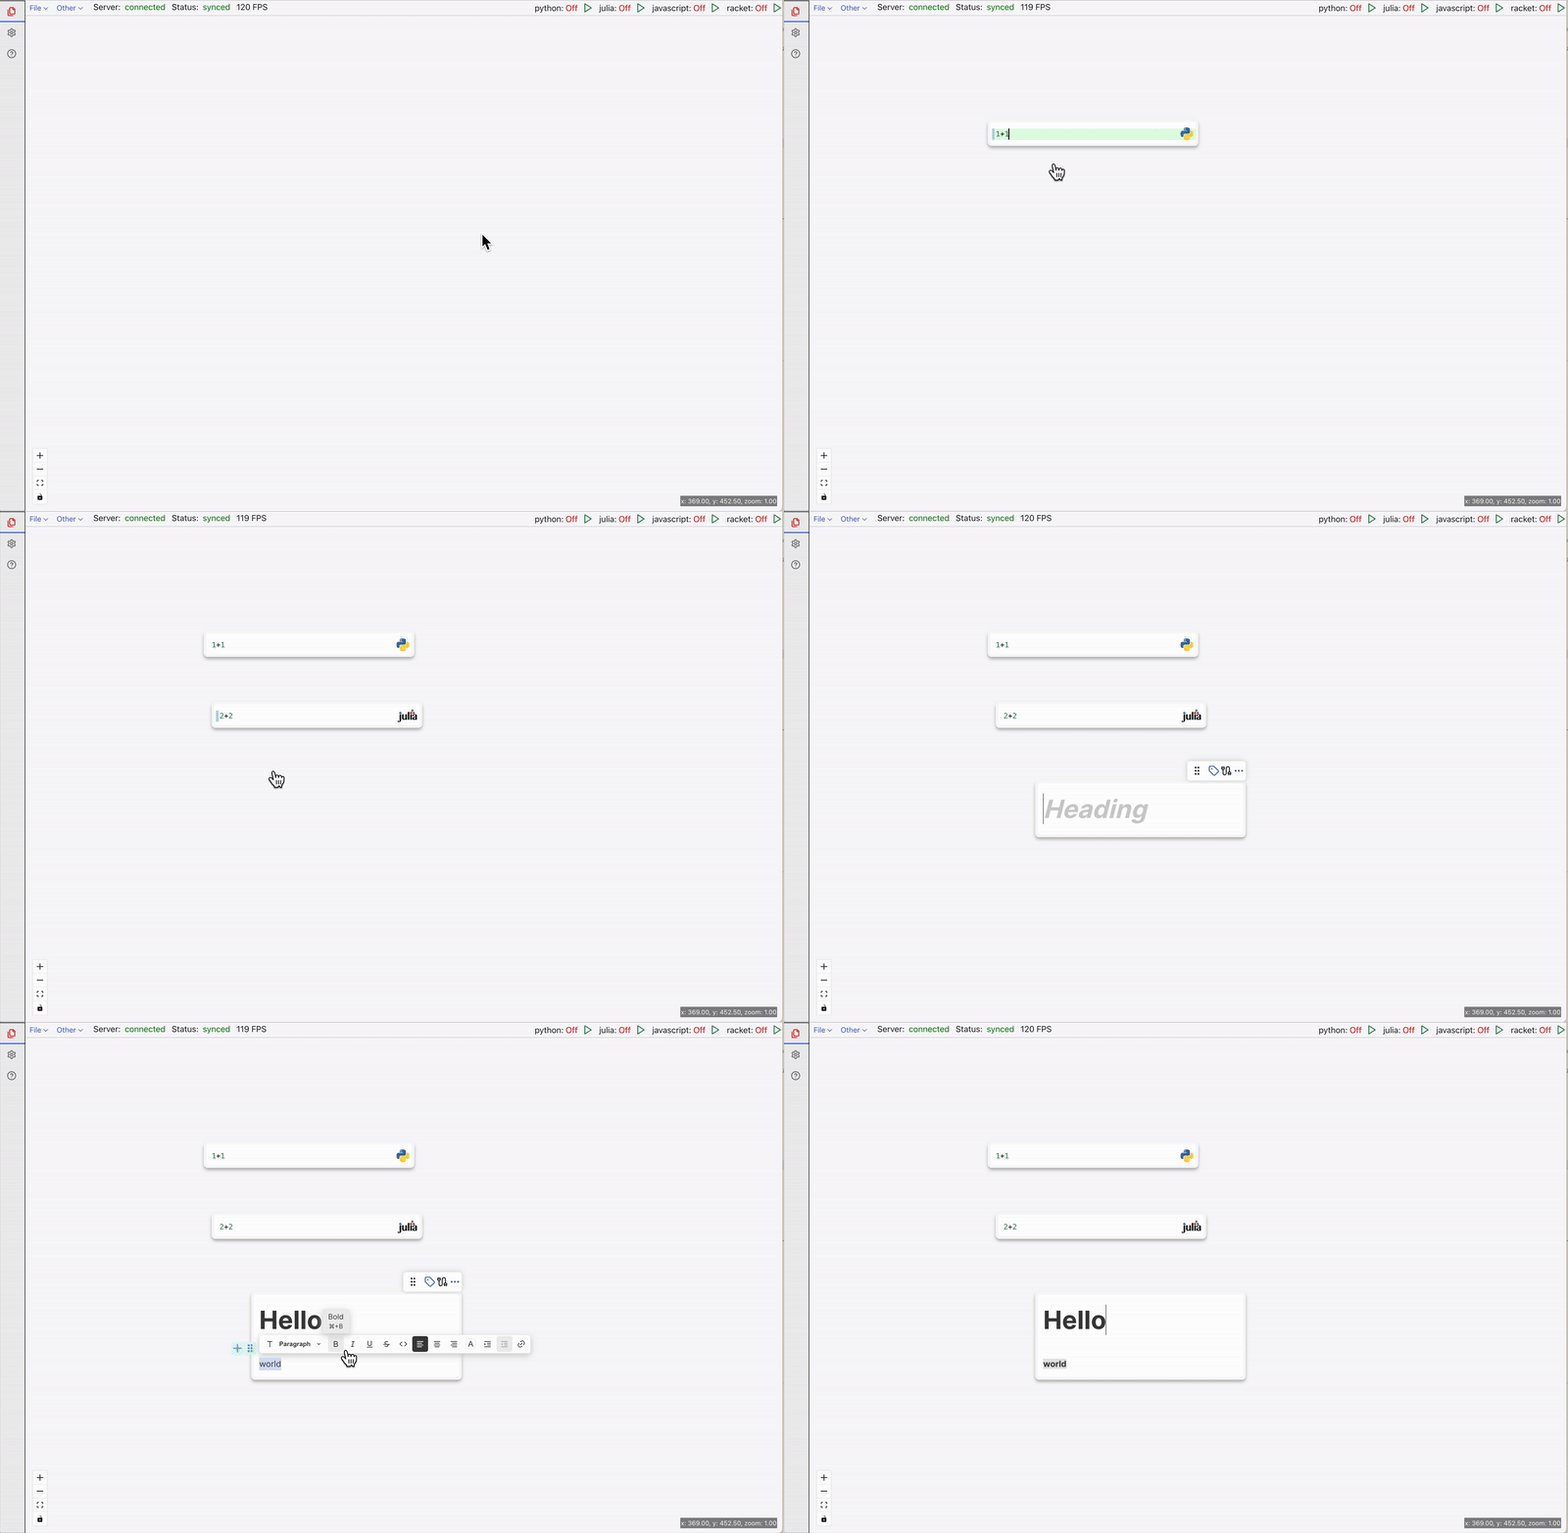
Right click on the canvas, then click "python". This will create a python pod at the position of clicking.
Pod toolbar
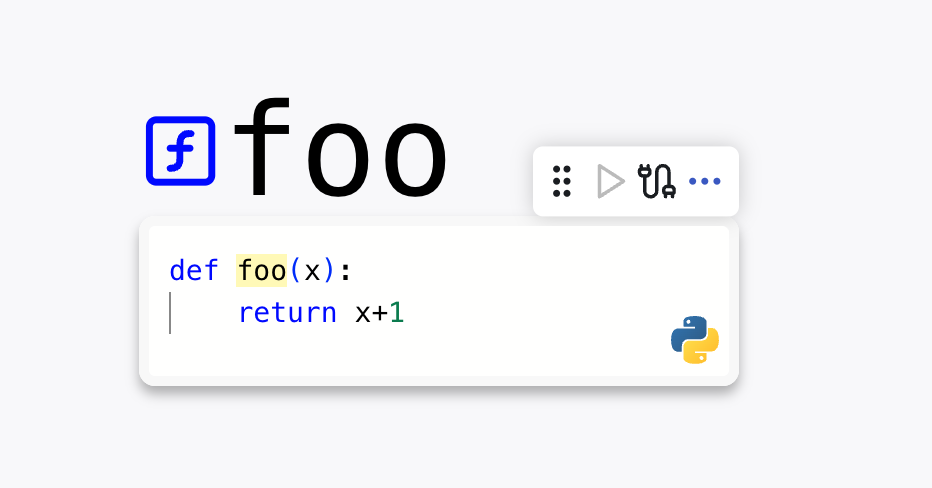
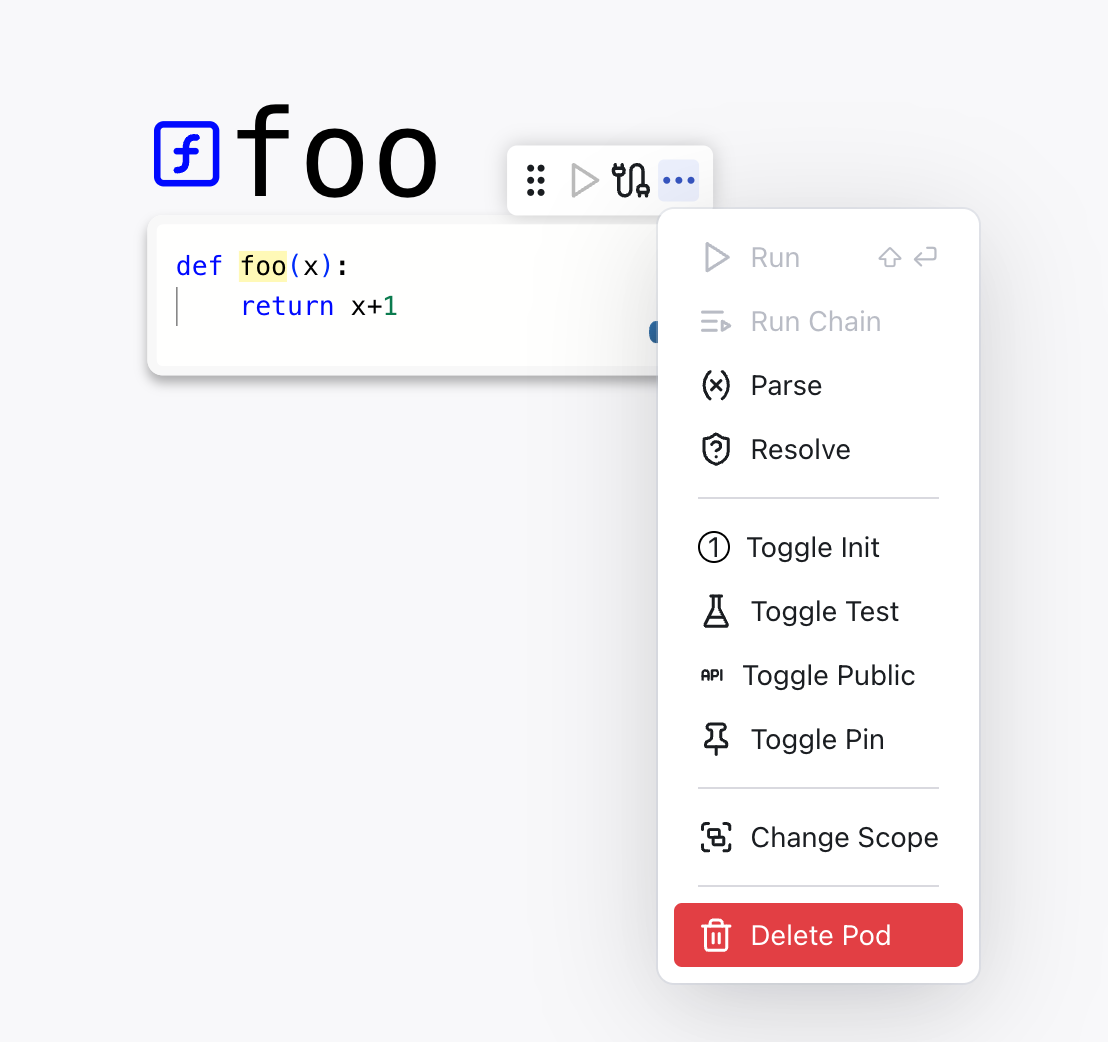
When you hover on the pod, the toolbar will show on the top right corner.
Moving pods
Option 1: There's a grab icon on the toolbar. Drag on it will move the pod.
Option 2: You can also drag to select one or more pod and move them at once.
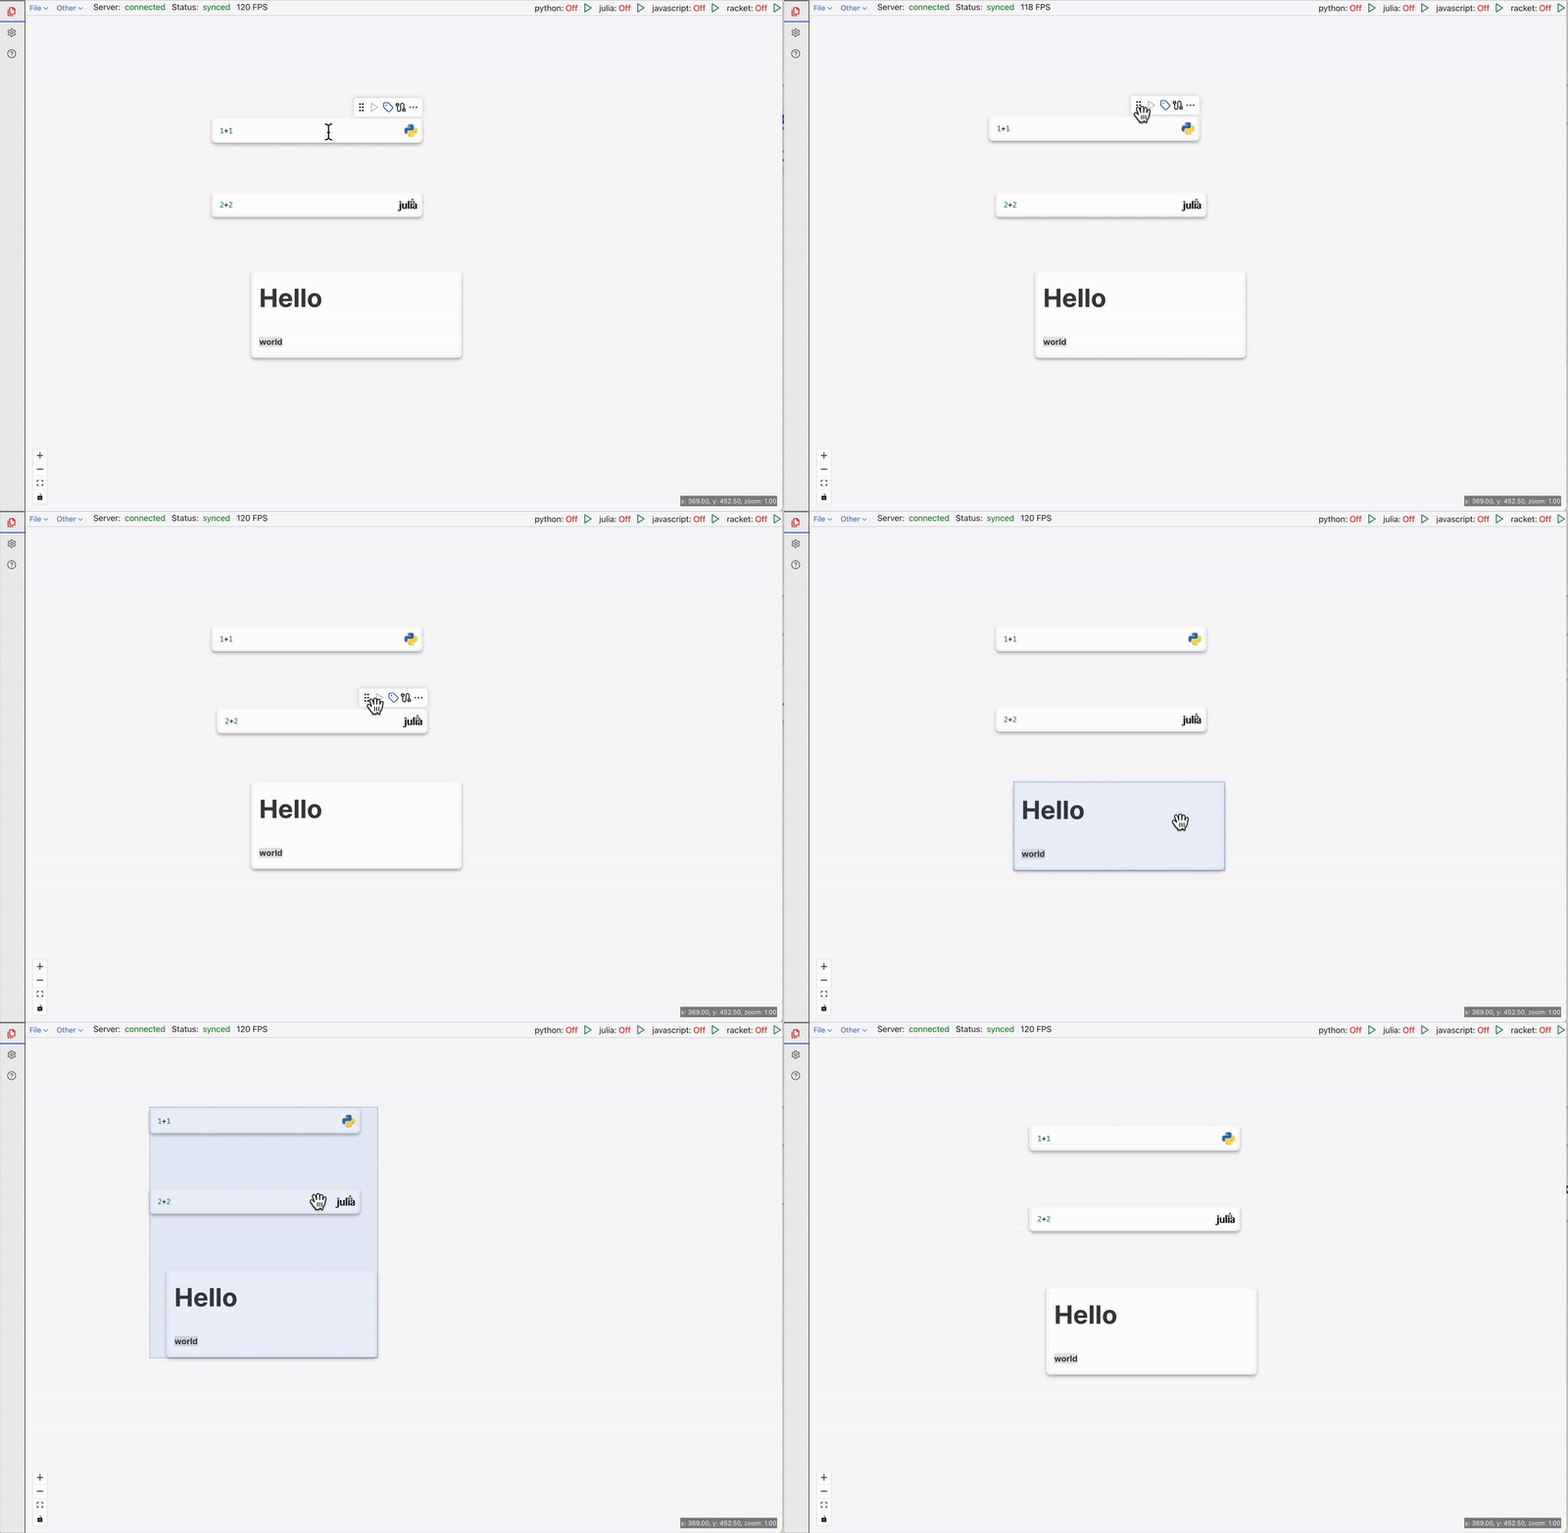
Special note for scope: if you want to "drag-to-select" a scope, you need to drag from outside into it. If you drag inside a scope, only inner nodes will be selected.
Deleting a pod
In the pod toolbar, there's a delete pod button to delete a pod.
Canvas
Moving around the Canvas; Zoom In & Out
If you're using a touchpad
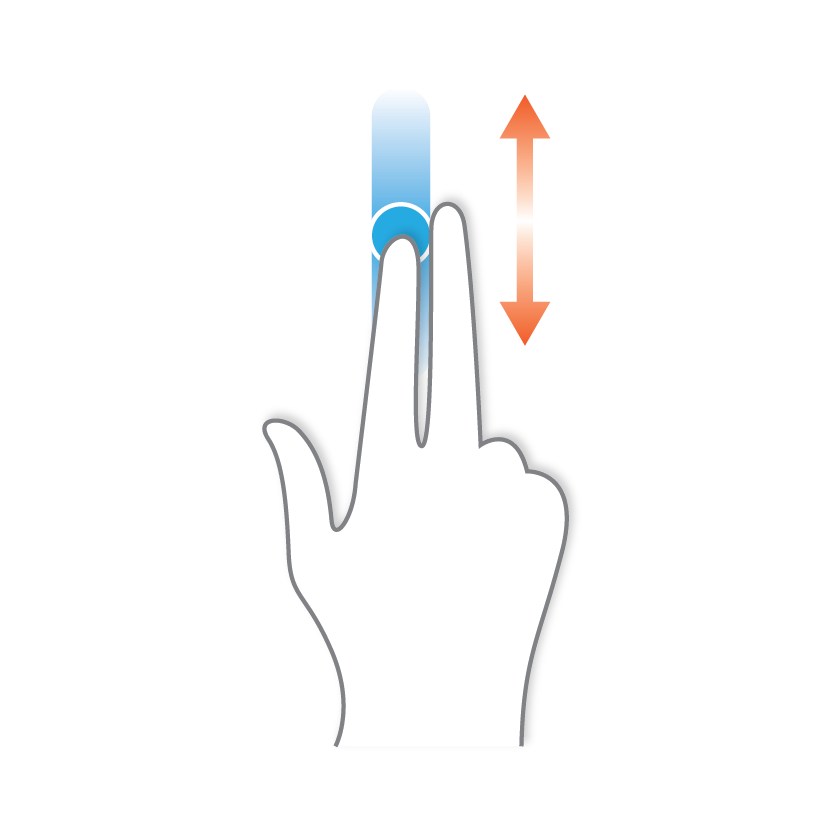
- swiping with two fingers can move your view on the Canvas
- pinch with two fingers to zoom in and out
If you're using a mouse
- click and hold the middle button can drag the Canvas
- scroll to zoom in and out
Execution
Run a pod
First, you need to start the runtime. In the runtime section of the sidebar, click the start button in python. The kernel will start and will be in "idle" status when it's ready.
If it's your first time using the app, a user volume will be created for you when you start your first runtime, therefore, it will take up to 1 minute for the kernel to be available. Future kernels should be started within 5 seconds.
The kernel will be shutdown in 24 hours.
Once the kernel is ready, you can click the run button on the pod toolbar to run the code. Like Jupyter notebook, the results will be displayed under the code.
You can also use shift-enter keyboard shortcut to trigger the code execution.
Unlike Jupyter, you can safely close the page while the pod is running. The results will be continuely populated in the cloud.
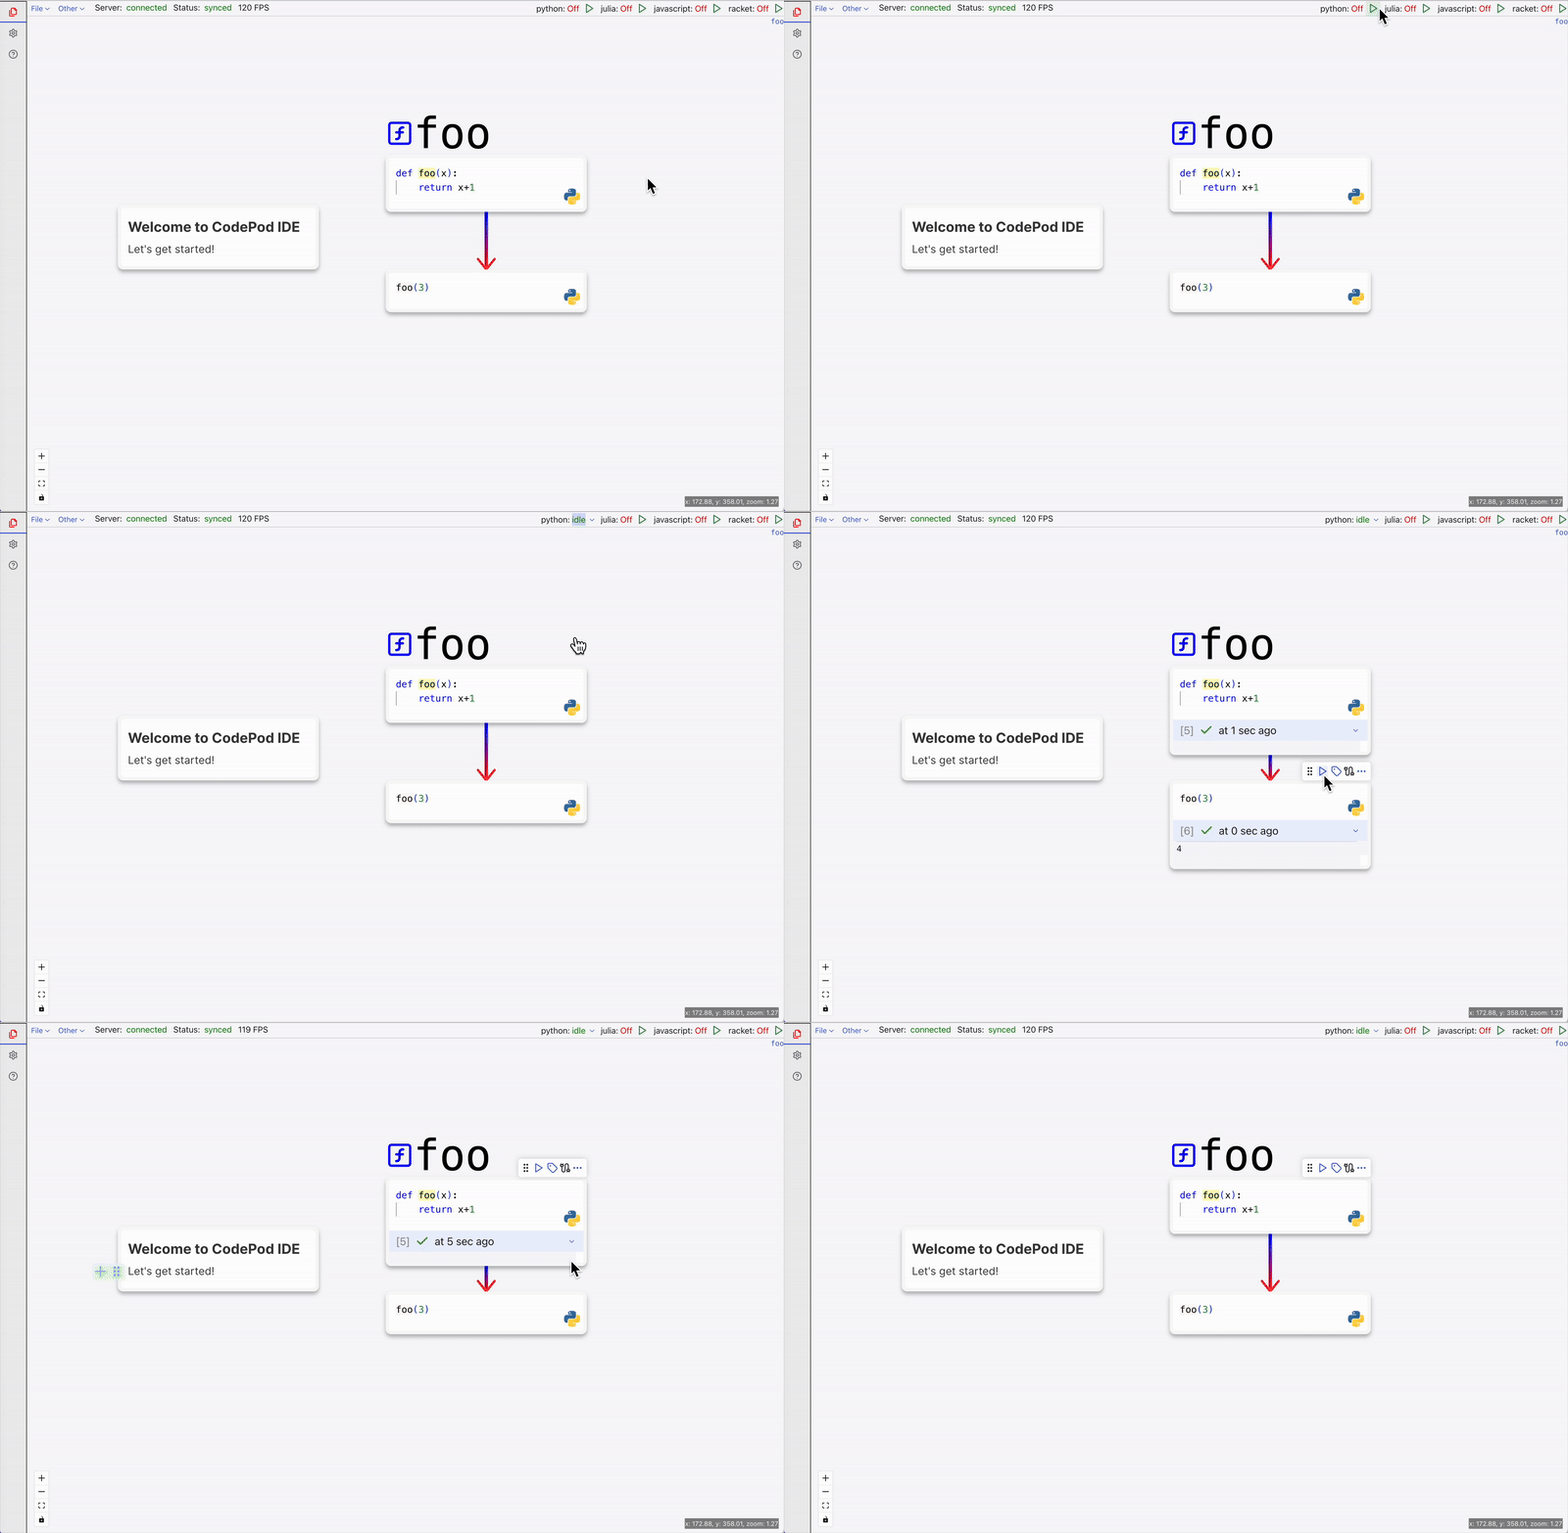
If the result output is too long, it will be folded. You can expand it using the button on the top-right of the result area.
User volume
The runtime kernel is a cloud container. The container will be re-recreated when the runtime restarts, so the files in the container are deleted. Each repository has a separate runtime container that doesn't share files.
To persist data files, there's a user volume mounted at /mnt/data where you can store your files that need to persist across kernel restarts and across repo. This user volume is a NFS volume, therefore the IO performance is much slower compared to local disk on the container.
Scope
Creating a scope
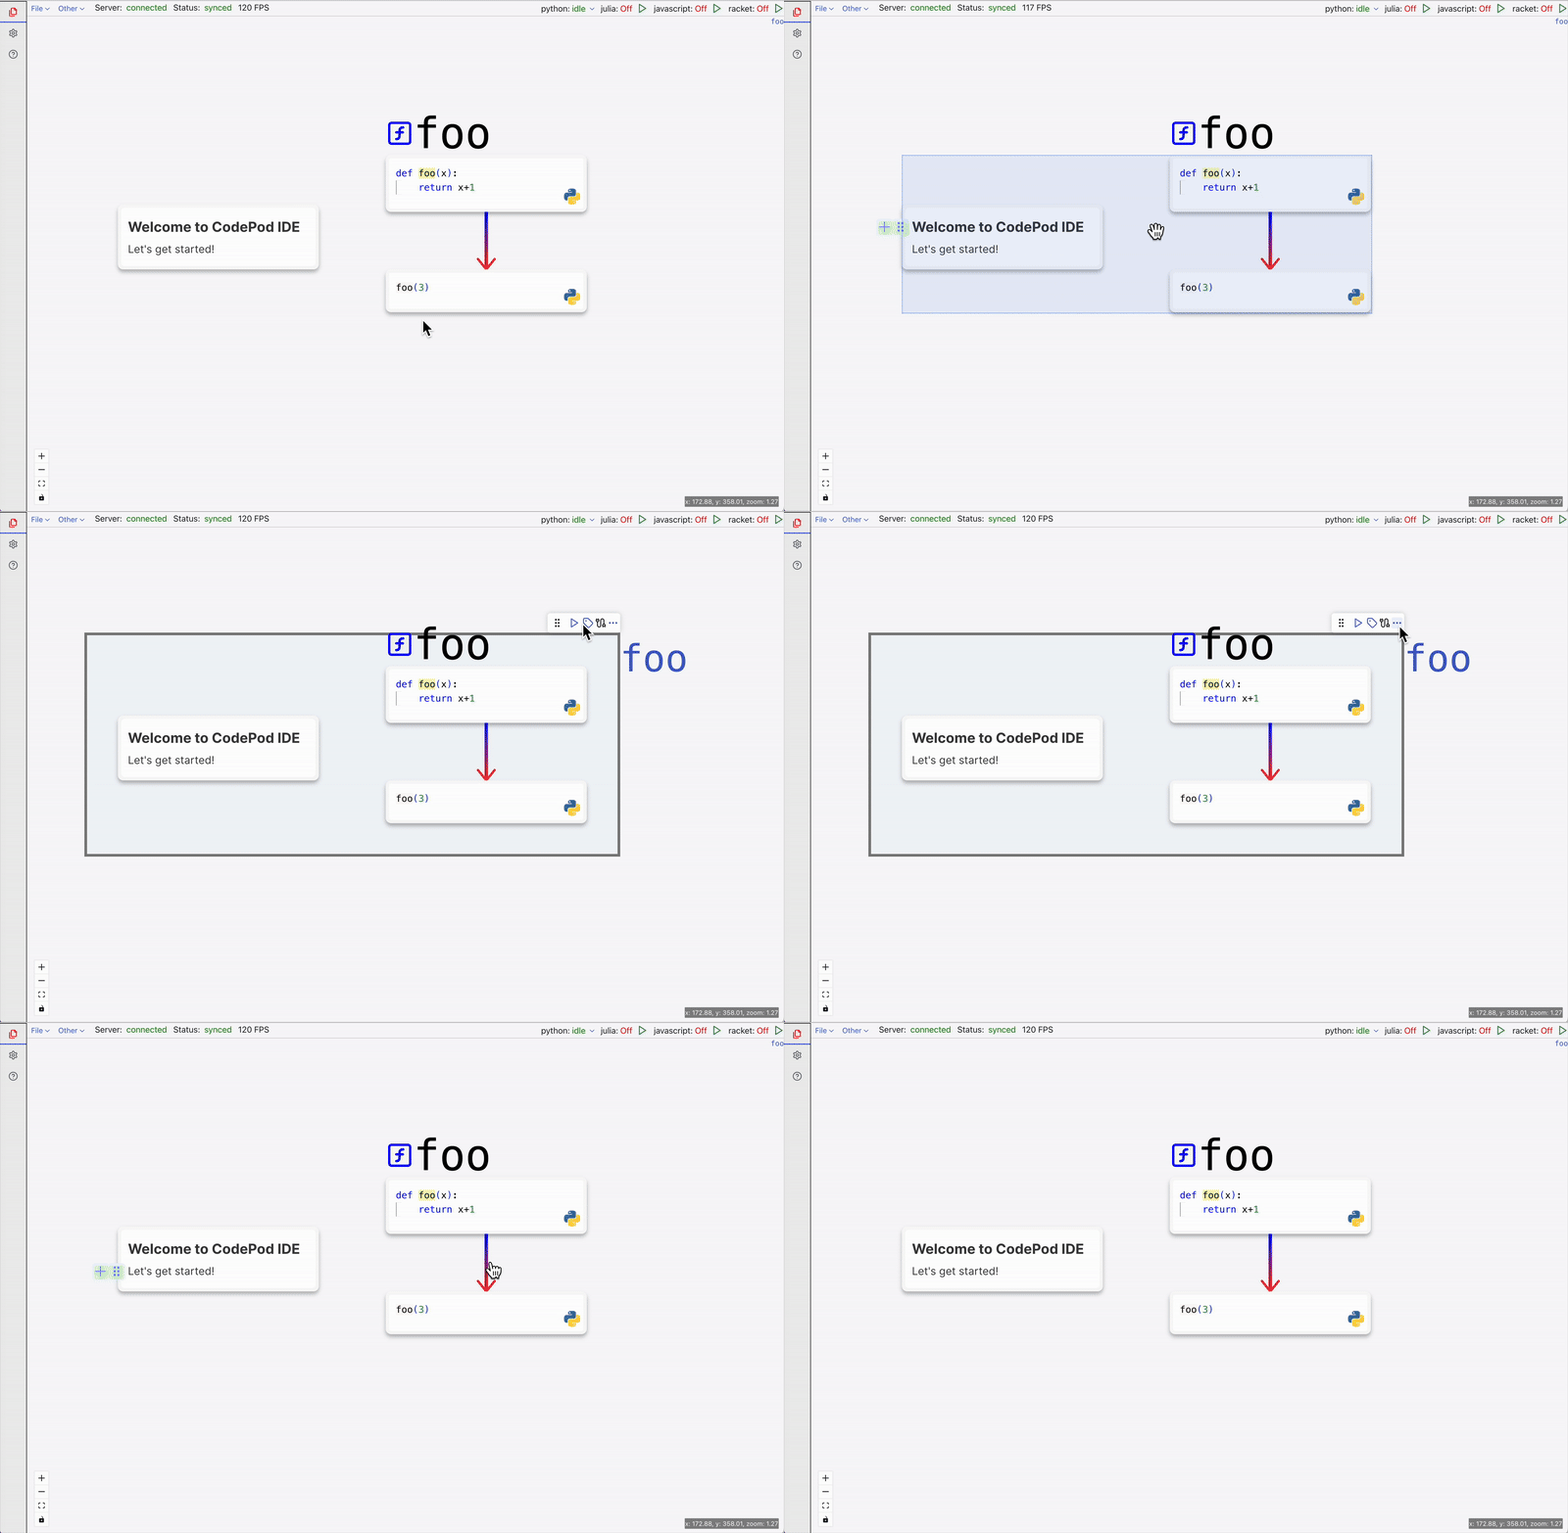
You can drag on canvas to select multiple pods. Then right click on the selection, and choose "create scope". A scope will be created.
When you drag to move the scope, all sub-nodes are moved together.
The drag-to-select behavior on scope is slightly different. You have to drag from outside of a scope to select the scope. Dragging inside the scope will select nodes in the scope.
Removing a scope
In the scope's toolbar, click "remove scope" to remove the scope but keeps its children.
To remove the scope and all its children, click "remove scope and children".
Copy and paste a scope
To copy a scope, click on the "copy" button in the scope toolbar.
To paste a scope, right click on the canvas and choose paste. The scope will be pasted into the right click position.
You can copy and paste scopes across repositories. It will overwrite your system clipboard.
Move a pod into and out of a scope
Dragging the pods won't change the scoping, but there will be visual marks to highlight problems:
- If two pods overlap, their borders turn pink.
- If a pod is moved out of its scope, the pod and the scope borders will trun orange.
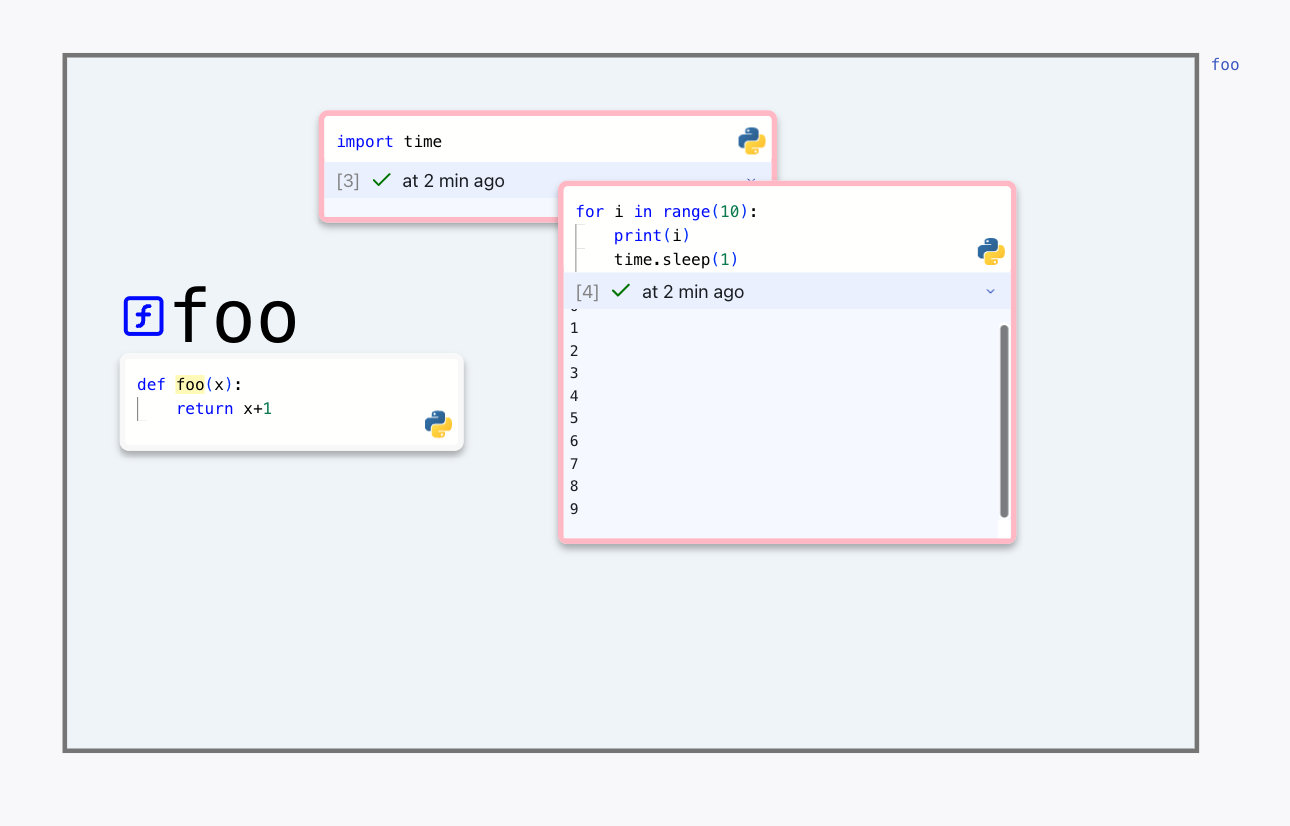
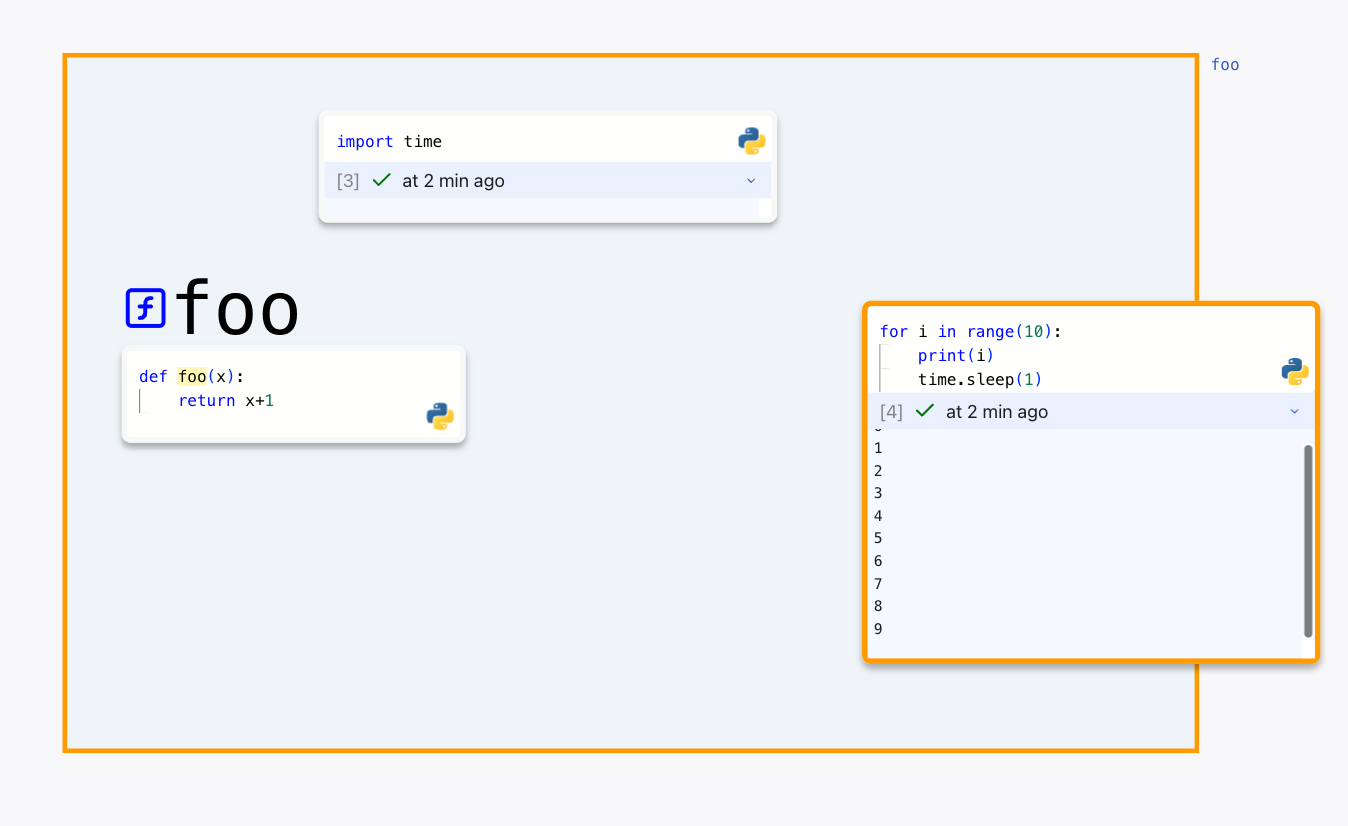
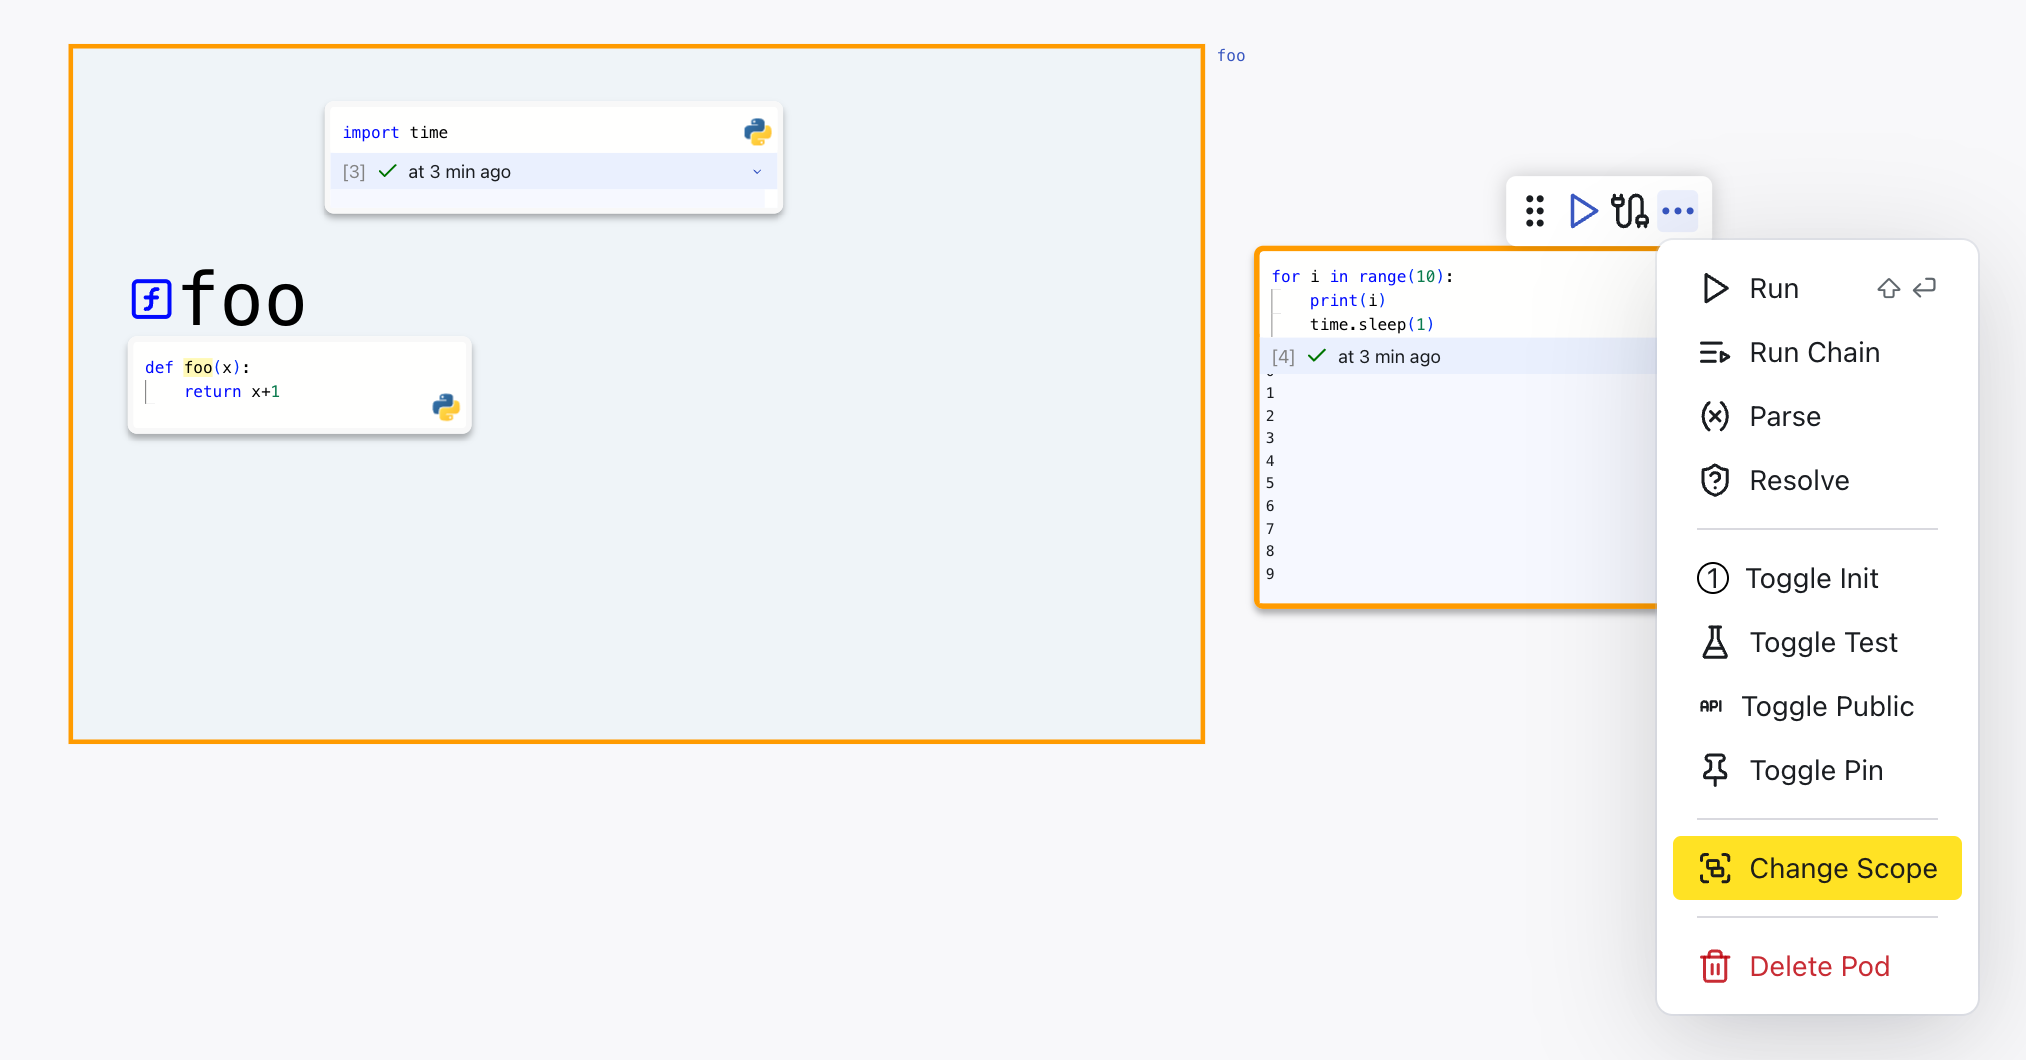
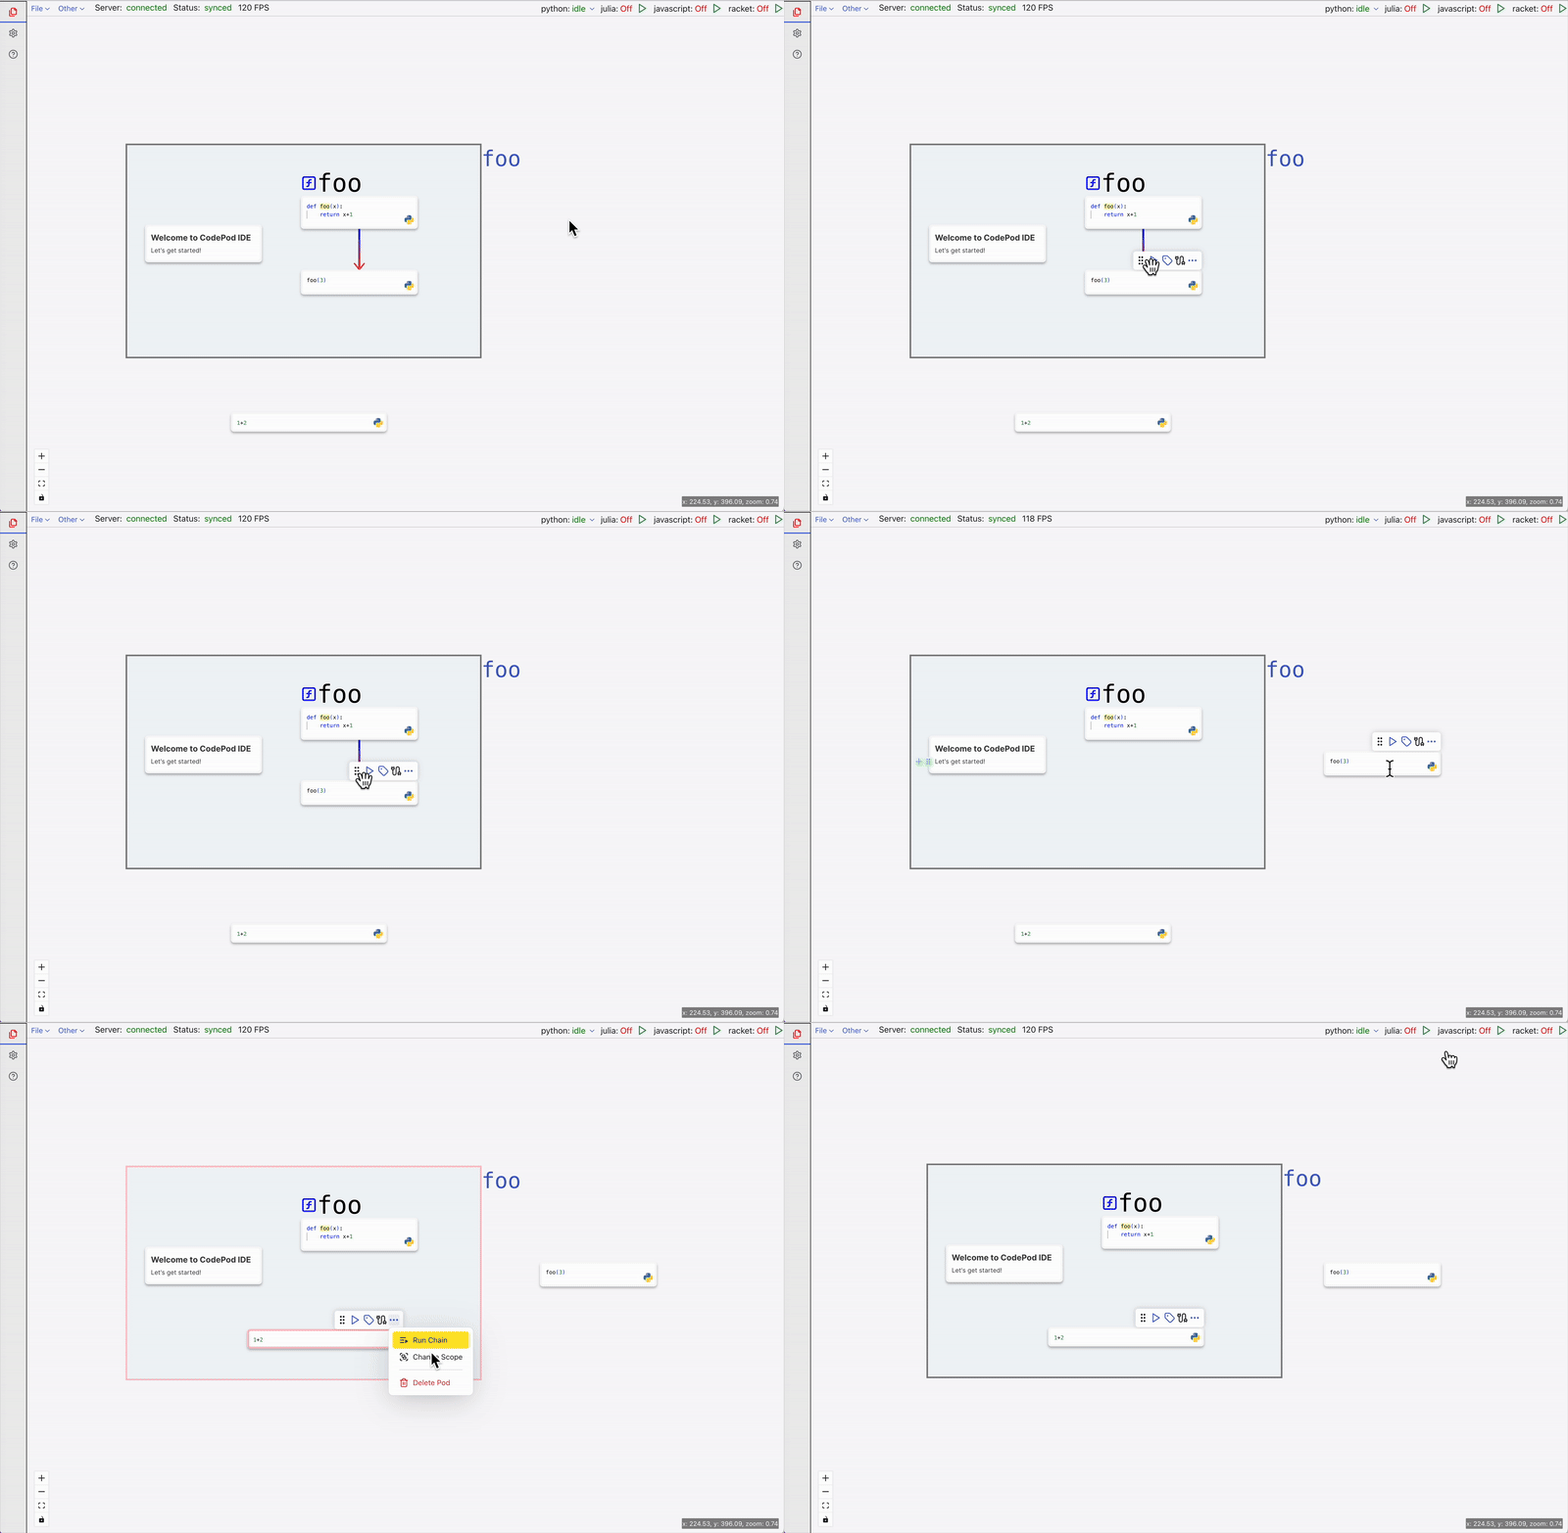
To actually move a pod into a scope, you can first move it in place, then click the "change scope" button on the toolbar (in the dropdown menu).
To move a pod out of a scope, you can first move it out then click the "change scope" button on the toolbar.
Run all pods in a scope
You can run a scope by clicking the run button on the toolbar. The execution order is the topological order w.r.t. the def-use edges and manual edges. That is, if there's an edge from a to b, a will be executed before b. In case of cycle, the cycle point is silently skipped.
Scope semantics
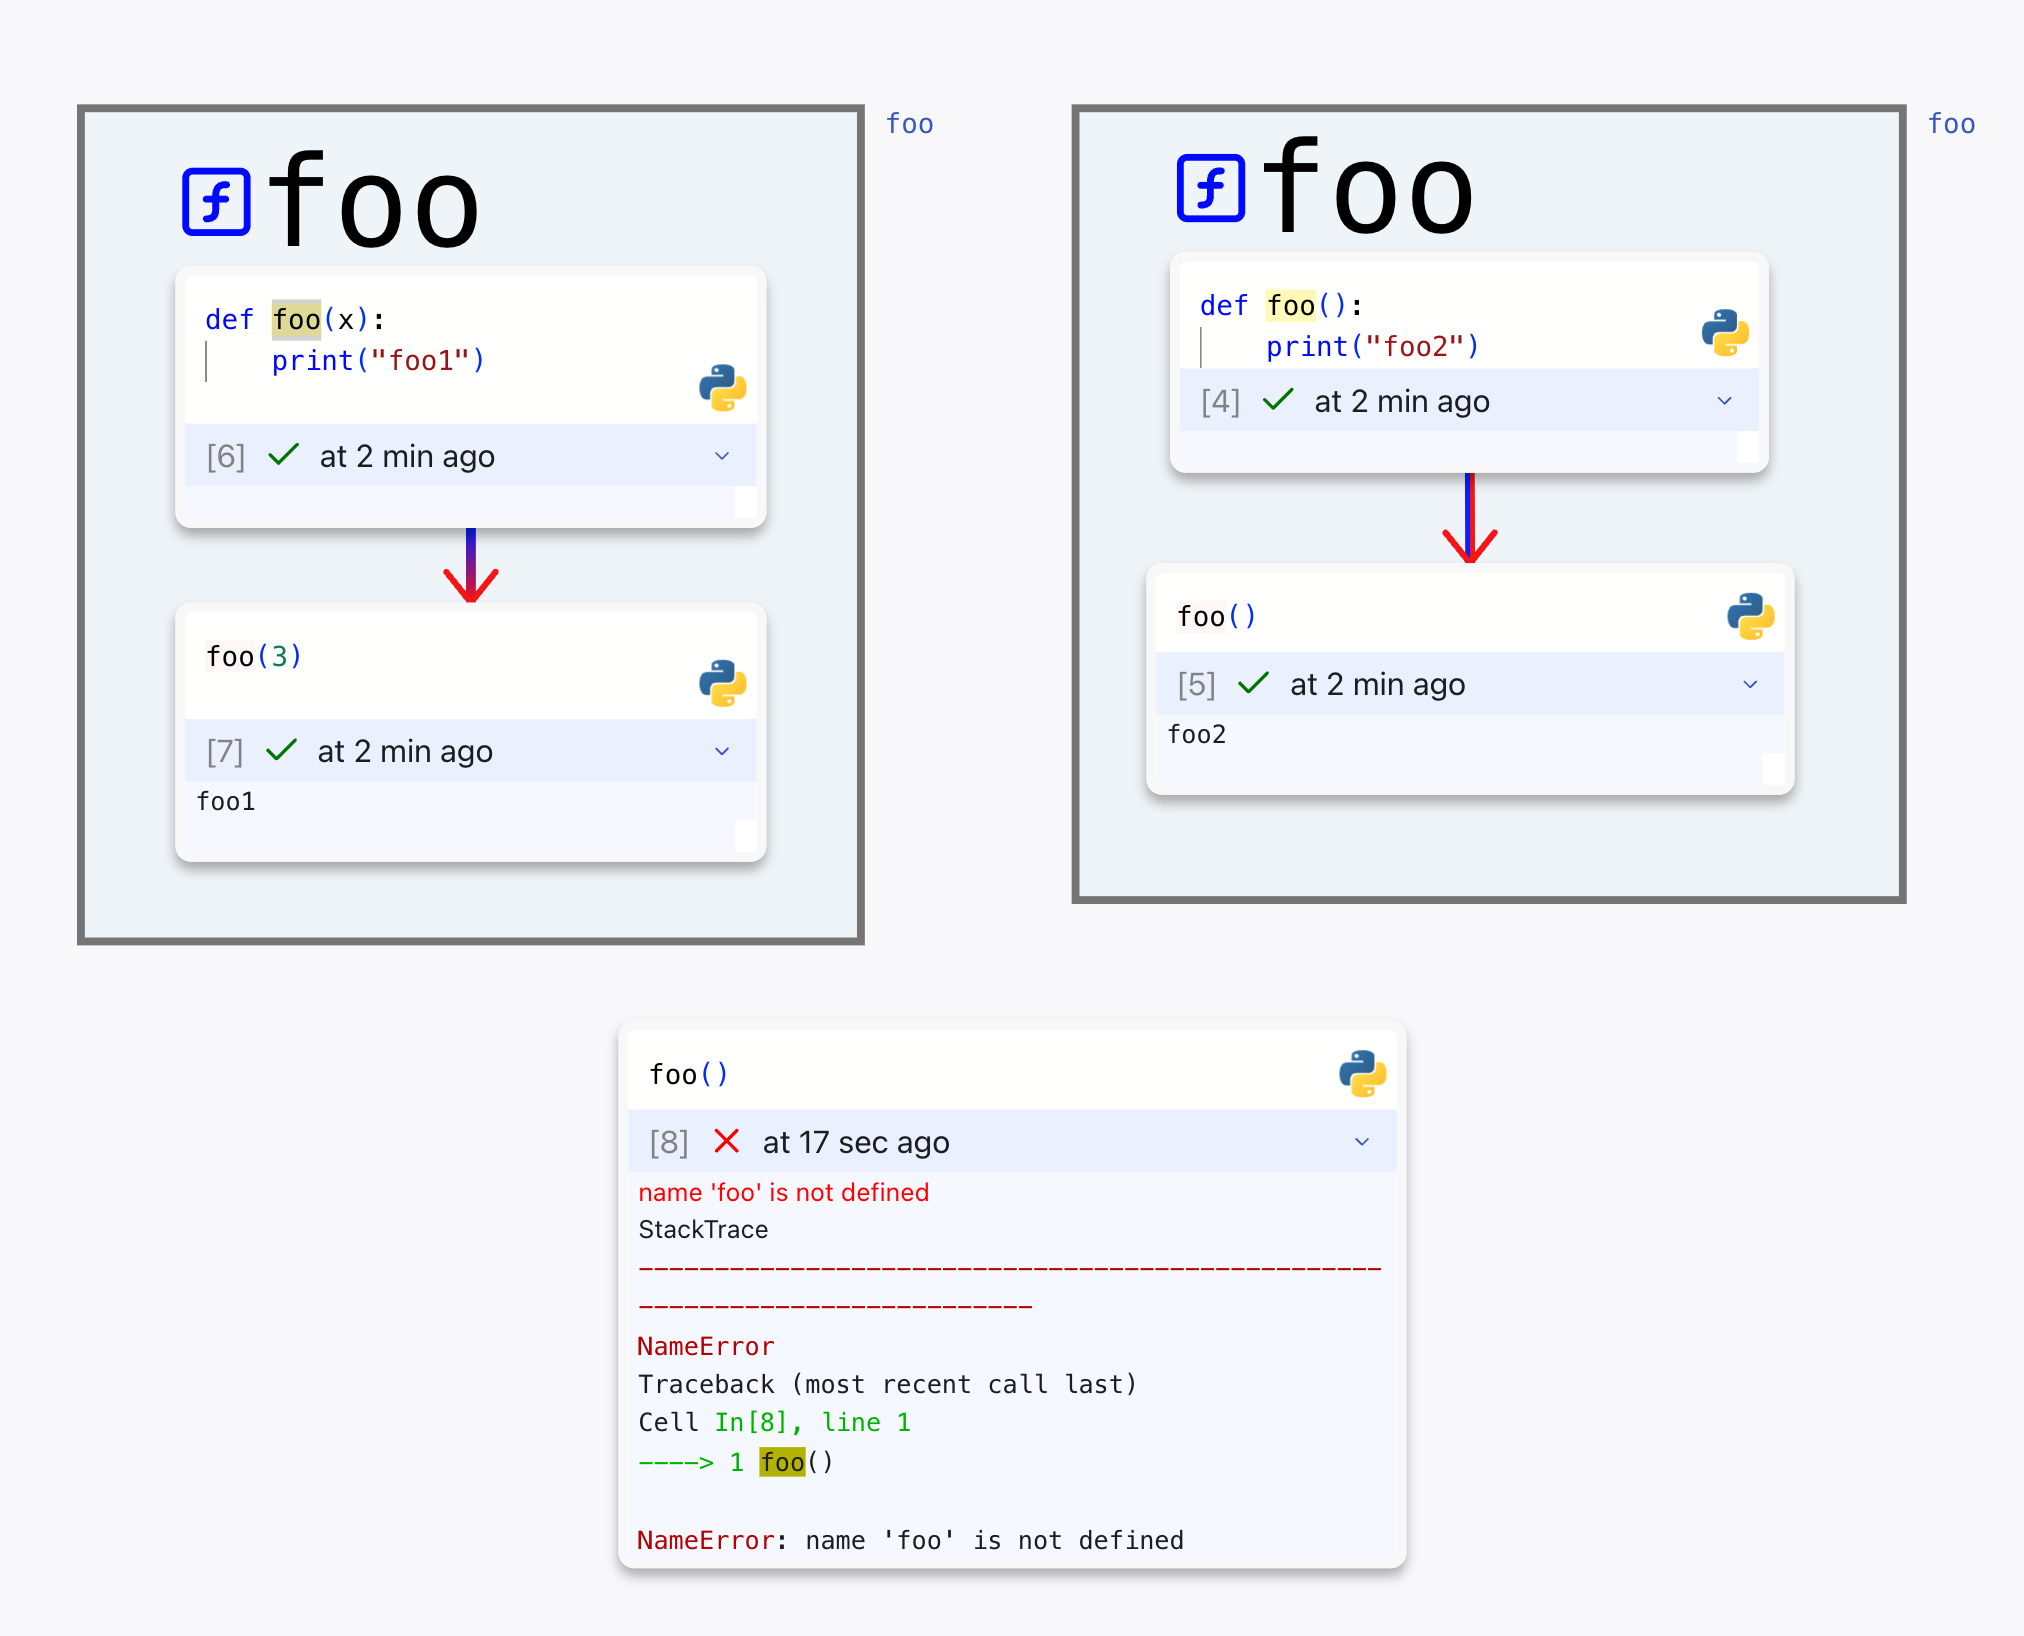
Not only can you organize pods with scopes, they also have semantic meanings to help you isolate namespaces in the runtime.
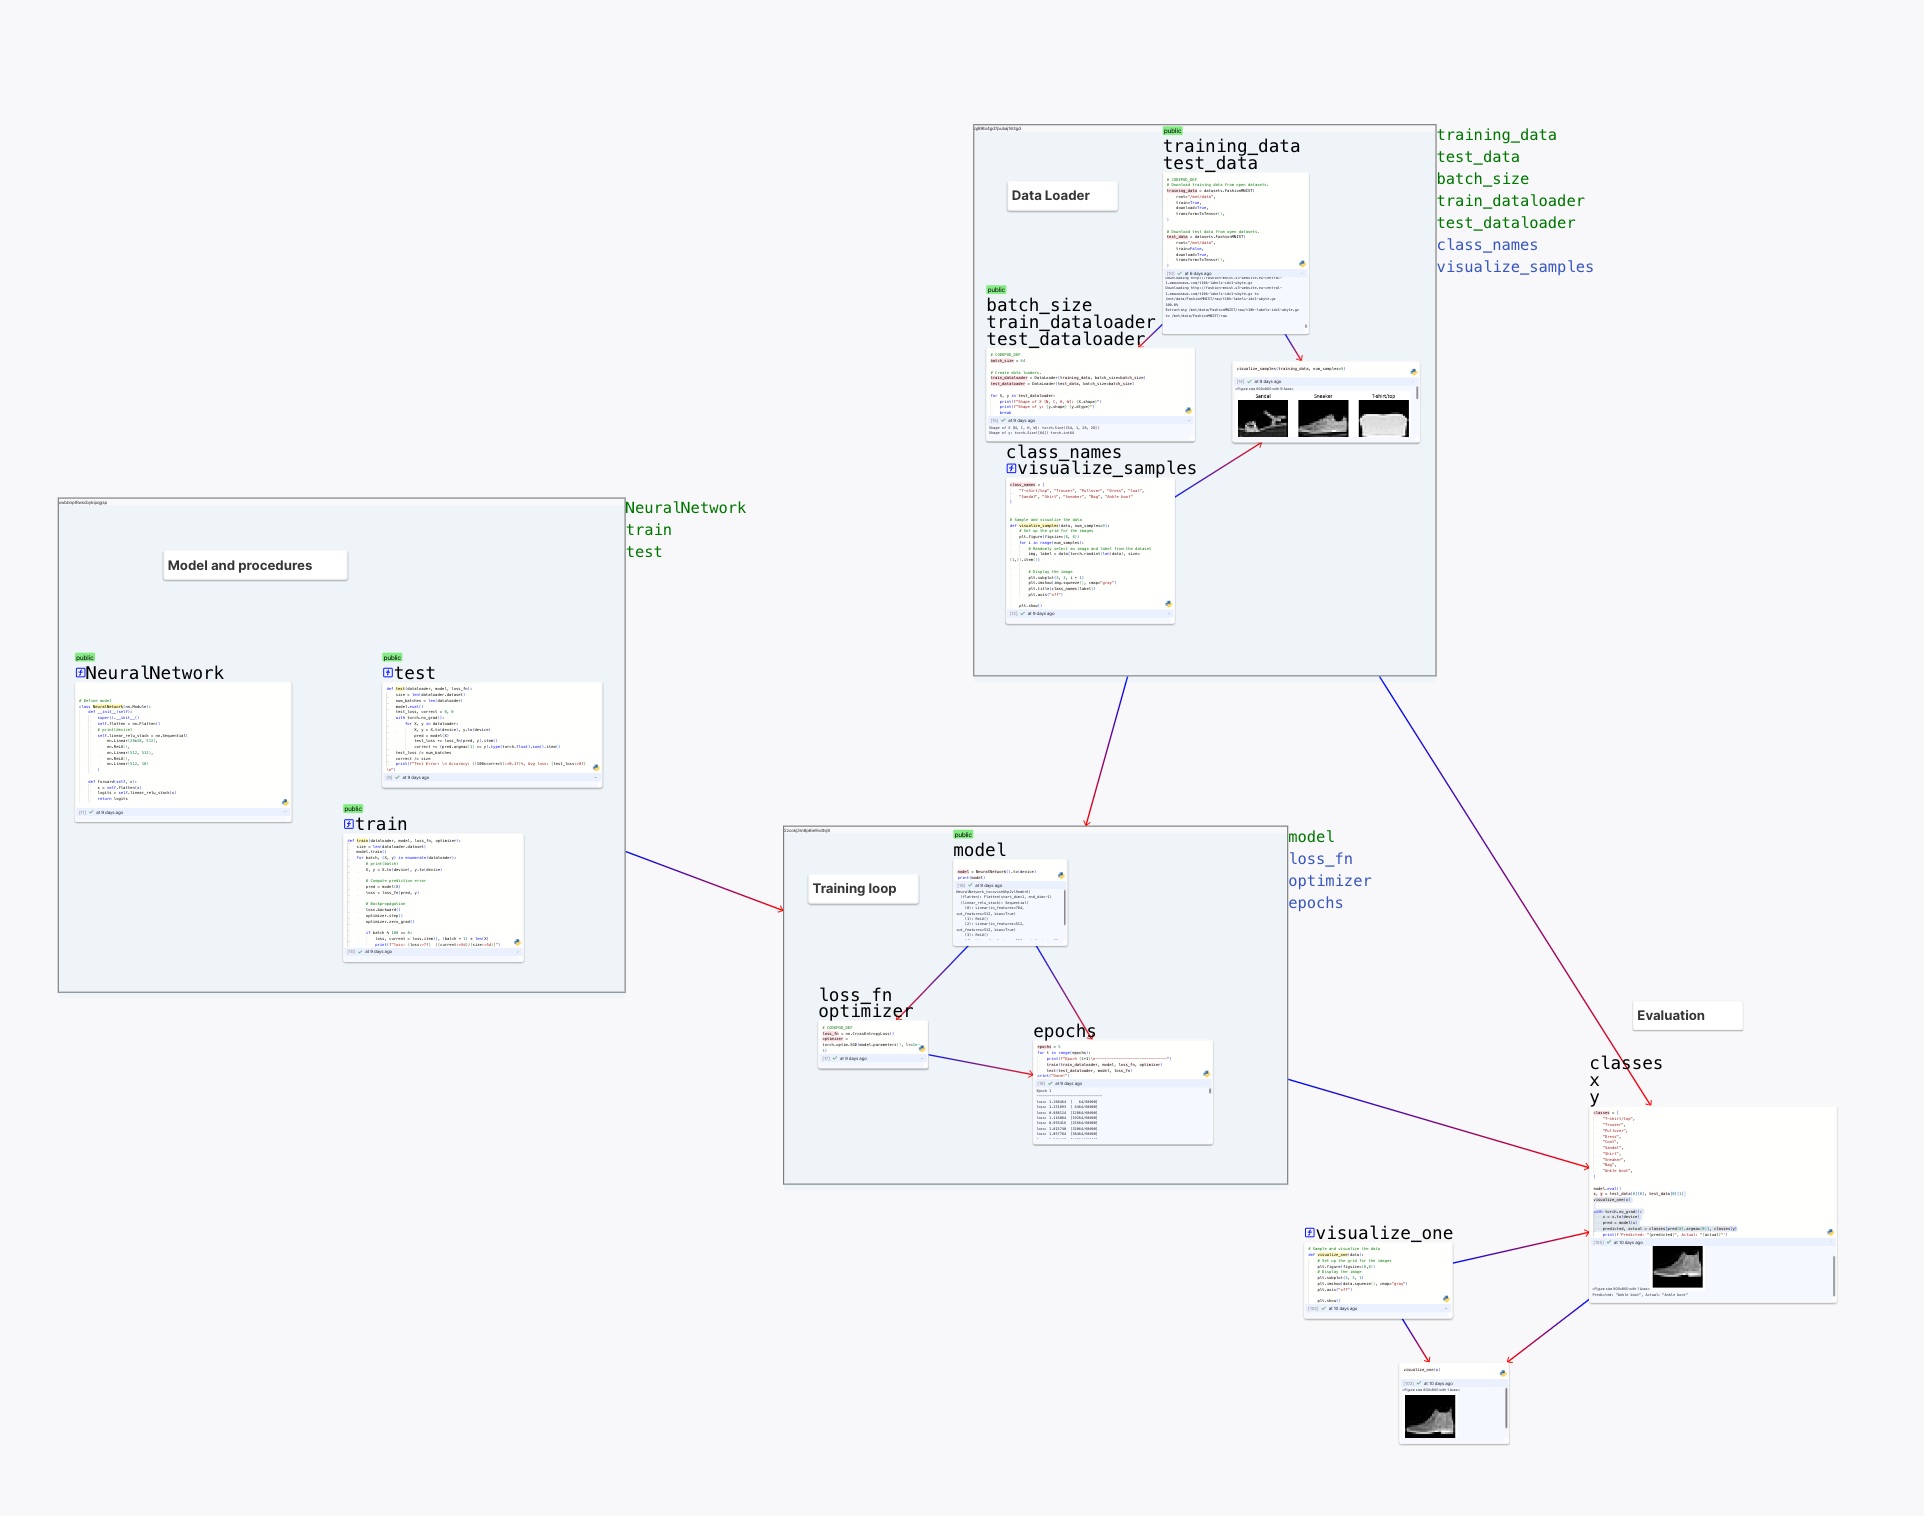
First of all, scopes are separated. The function foo in one scope is different
from the foo in another. A function is only visible inside the scope
(including its children).
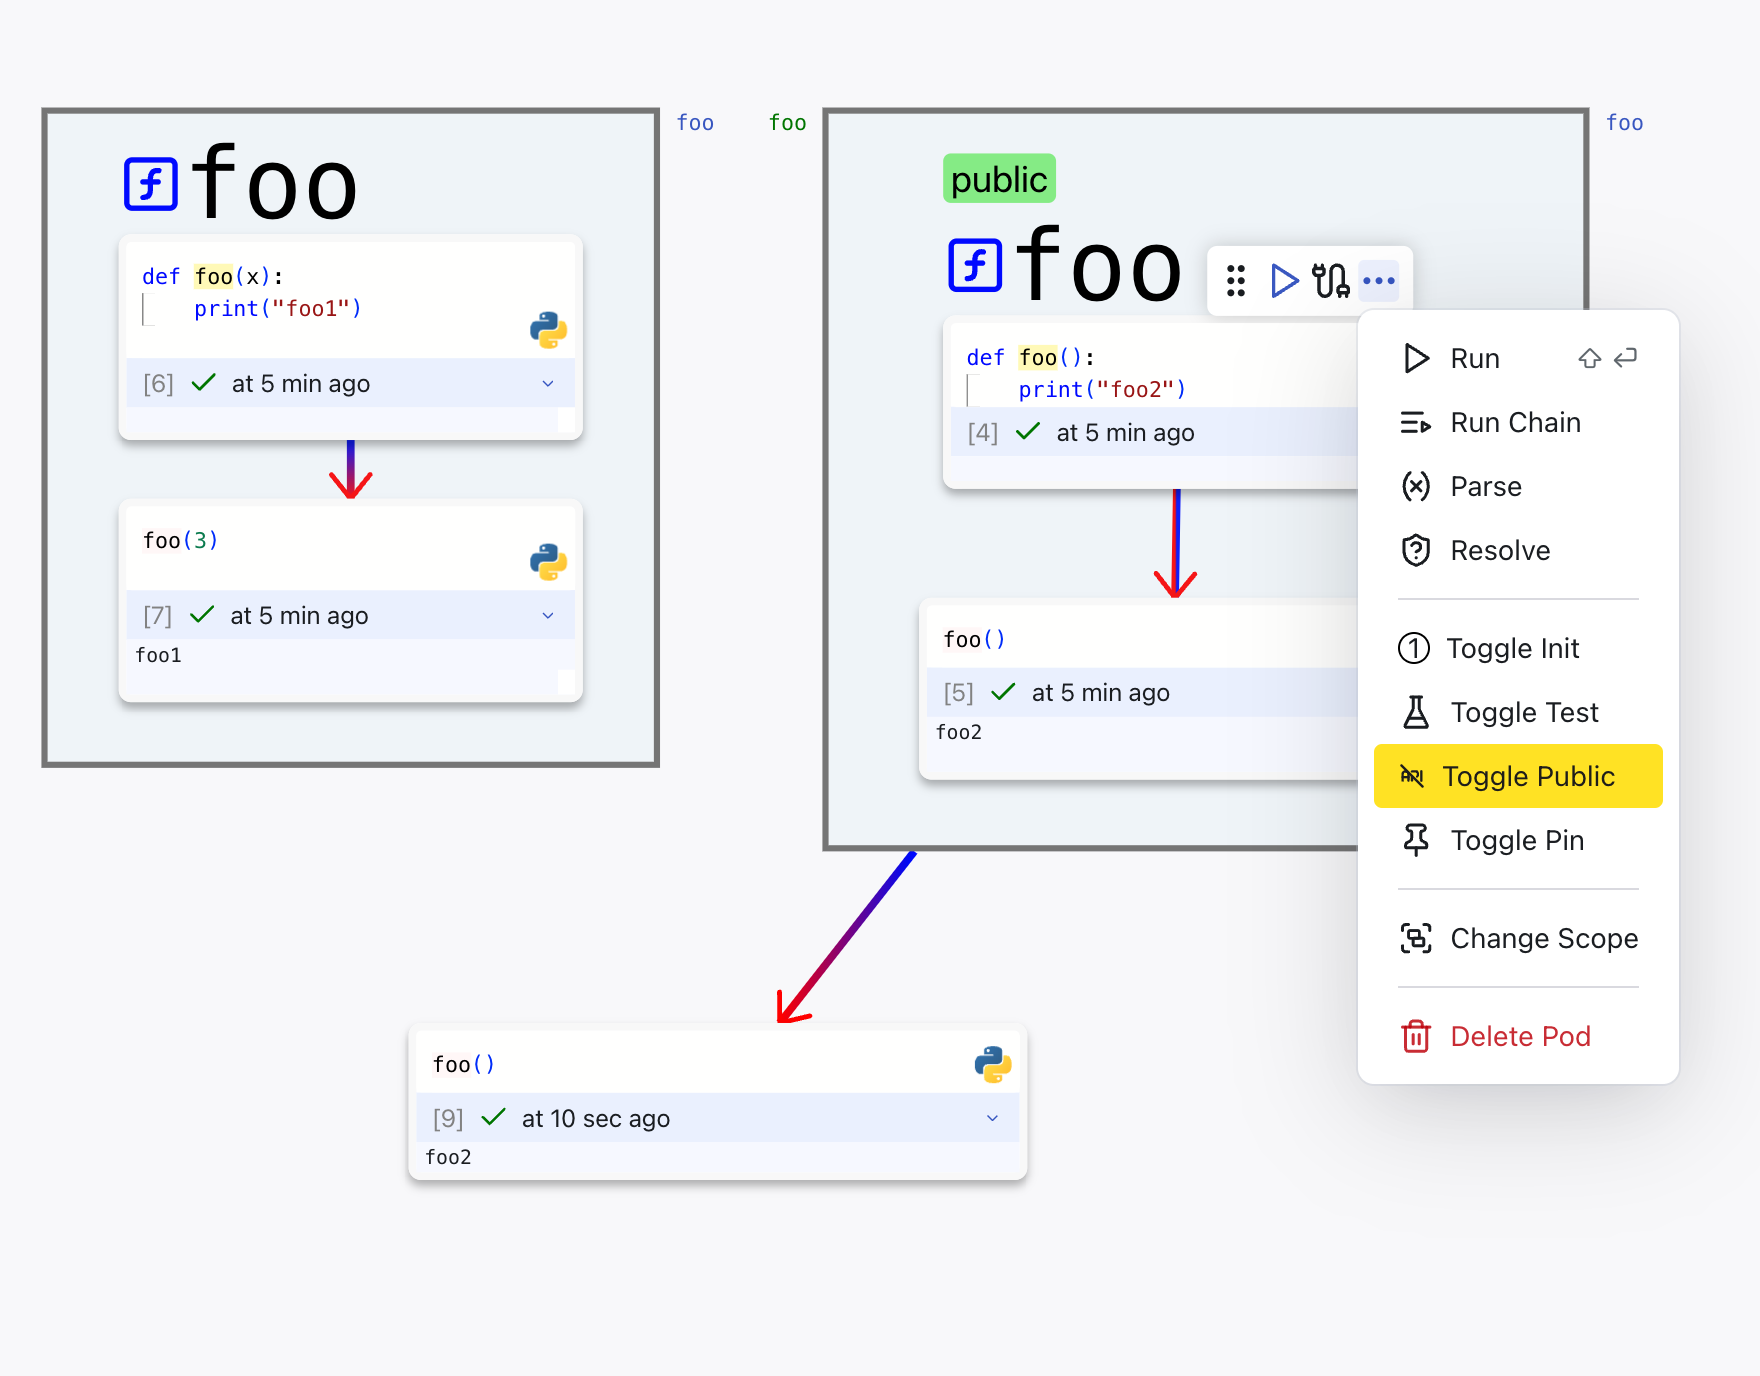
Second, you can export a function out into its parent. This is the use case where inner scope implements some lower-level functions, and expose a public API to higher level. You can mark a pod as public by clicking on the "toggle public" button. The pod will be visually marked "public".
Edge
Drawing an edge
There's a edge icon in a pod's toolbar. Drag on it and drop onto another pod will create an edge. This edge can be used to mark the execution order. For example, you can draw edges of a chain of pods and run the chain to simulate a Jupyter notebook.
Def-use visualization
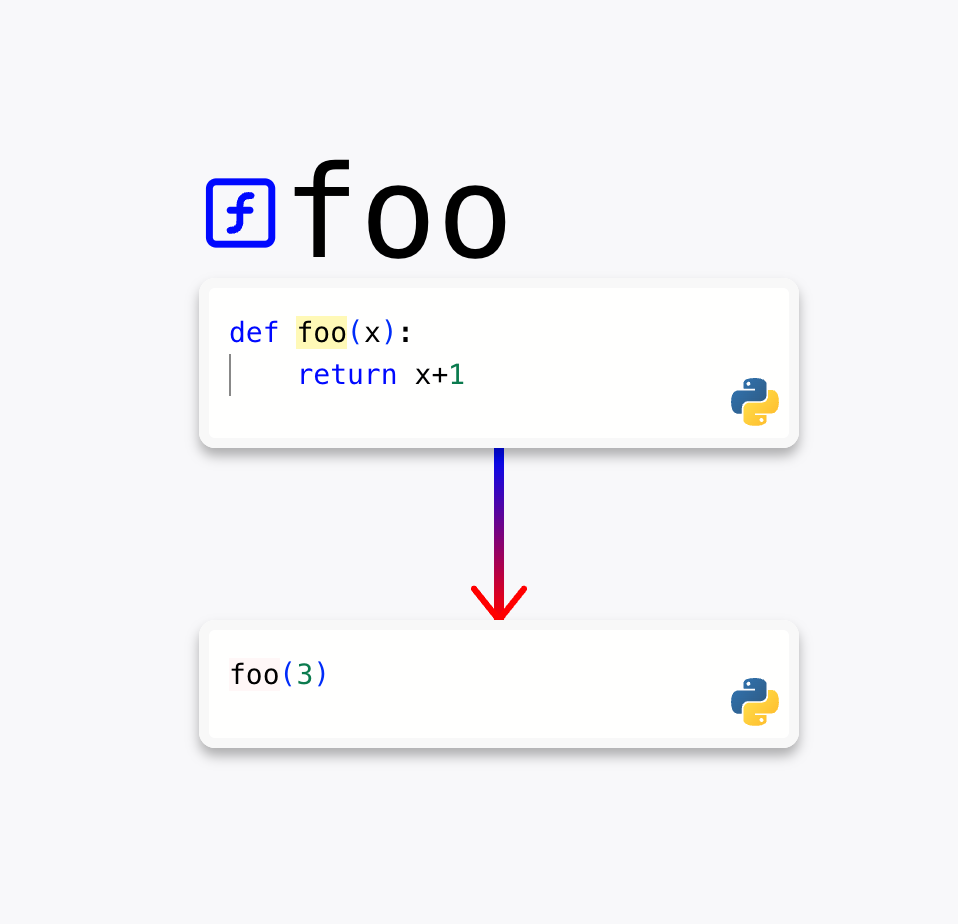
If a pod defines variables, functions, or classes, the defined symbols will be shown in the top-left corner.
If a pod calls a function defiend in another pod, there will be an edge from the definition to the callsite.
The def-use edges are only visualized inside the scope to avoid cluttering the view.
Other
Resizing a pod or scope
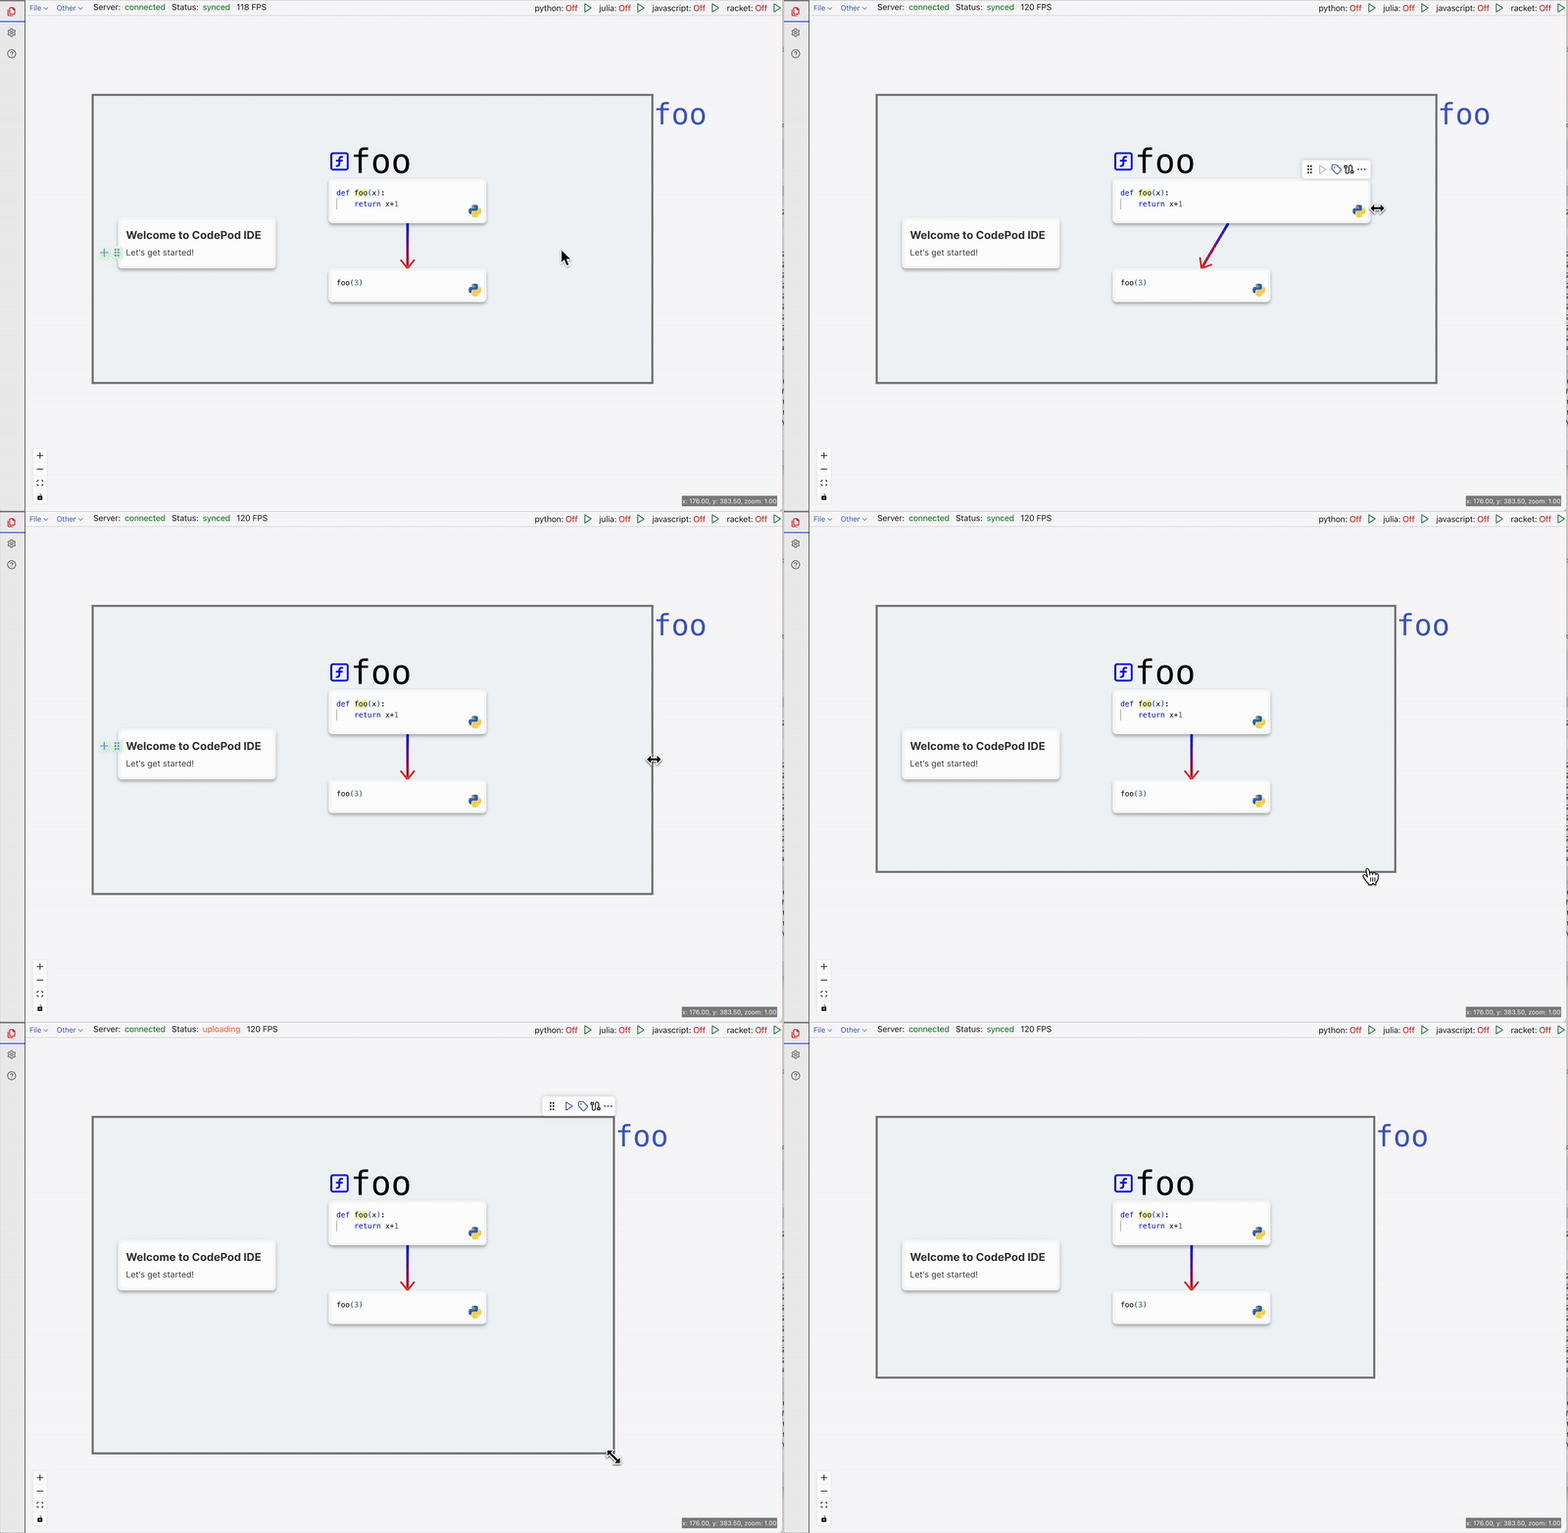
You can resize the width of a pod by dragging at its right edge. The height is automatically adjusted based on content.
A scope can be resized in all directions on all edges.
Rich text pod (markdown)
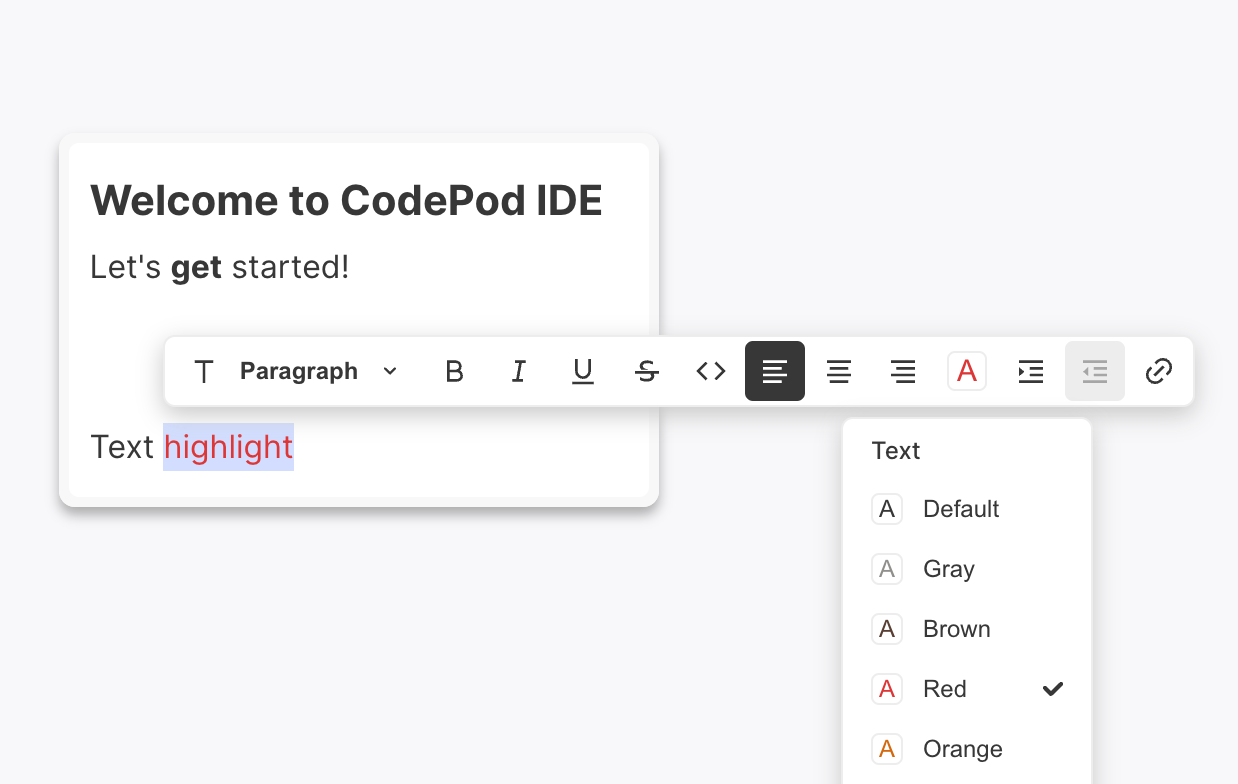
You can create a rich text pod by right clicking on the canvas and selecting "Note". This is a notion-like WYSIWYG editor with markdown syntax support. You can write notes and documents in this editor.
Import a Jupyter notebook
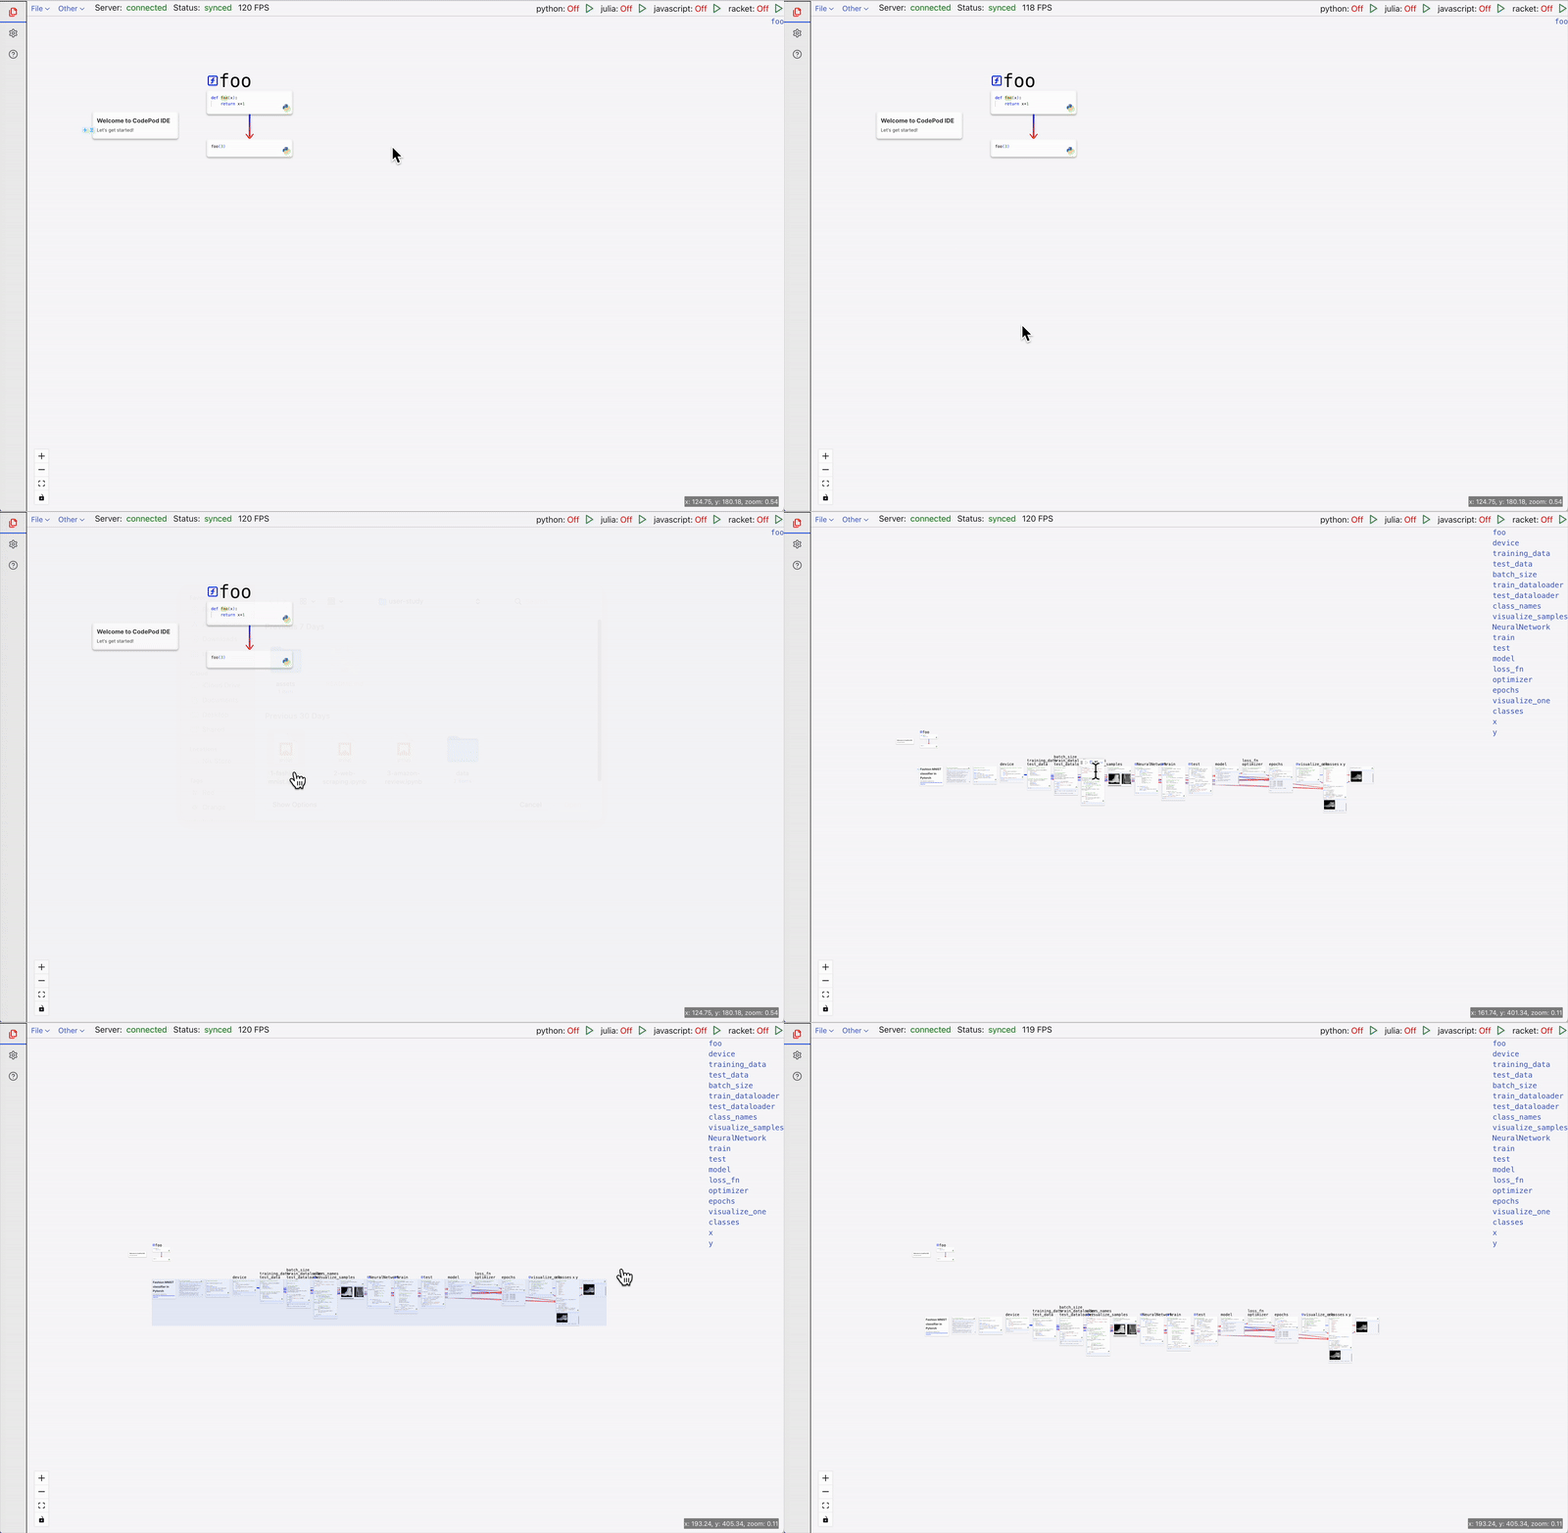
Right click on the Canvas and select "Import", then choose your jupyter notebook file. The notebook will be imported into a scope and layout horizontally.
(Best?) Practices to order the pods
- Put logical related code pods into a scope
- Use nested scopes to build a hierarchy:
- inner scope represents lower level functions
- outer scope represents higher level functions.
- inner scope expose APIs into outer scope
- Use def-use edges to layout the pods. E.g., order the pods so that edges flow from top-left to bottom-right.
